Google
Showing posts with label Dessert. Show all posts

Friday, August 22, 2008

Sweet Couscous


This recipe is unique in the sense that it is sweet and can be eaten as a meal or dessert.

Either way, it is extremely appealing for sweet tooths and cashew lovers; very filling and comforting on a cold winter night.

Sweet Couscous

250g couscous
150g sultanas
150g cashew nuts
50g butter
120ml honey
600ml boiling water
2 oranges (peeled) - optional

1. Place couscous and sultanas in a large, heat-proof bowl and pour boiling water. Cover and set aside for 5 minutes until liquid is absorbed and sultanas are plump. Use a fork to separate the grains.

2. Heat a frypan, throw in cashews and stir quickly until roasted. Set aside.

3. Melt butter in a pan. Add couscous mixture and honey. Cook stirring well until heated through.

4. Serve pipping hot with pieces of oranges and roasted cashews.


AddThis Social Bookmark Button

Wednesday, August 08, 2007

Green Tea Muah Chee


recipe modified from here

Ingredients:
250g glutinous rice flour
350ml water
4 tbsp shallot oil

Green tea peanut mixture
Ingredients:
250g toasted peanuts, grounded into a fine powder (some bigger pieces are fine)
2 tsp green tea/ matcha powder
50g caster sugar
2 tb toasted white sesame seed

Method:
1. Prepare peanut mixture by combining all the ingredients. Set aside.
2. Mix glutinous rice flour, water and 2 tbsp of shallot oil together to form a smooth batter.
3. Grease a microwavable container with the remaining oil and pour batter into it.
4. Cover with lid and microwave on high for 2 minutes. Remove from microwave, stir the semi-cooked dough briskly in one direction. Return dough to microwave and High for 1 minute. Remove, stir and return to the microwave high for 30 seconds. Repeat this method twice or until it is cooked.
5.Using a pair of scissors, cut cooked dough into small pieces and toss it into the green tea peanut mixture.
6. Serve and sprinkle more peanut mixture as desired.

Tags:

AddThis Social Bookmark Button

Thursday, November 02, 2006

Mochi

Mochi....squishy, adorable tiny lumps of sweet gooey goodness!My first encounter with mochi was at a Japanese supermarket in Malaysia where candy and all sorts of snacks were sold. Being young and curious about all things "cute" I purchased a tray of 6 pretty pink mochi. I couldn't read the Japanese labels and didn't have a clue what they were filled with or even if they were sweet or savory. I didn't really care;...they were soft, round and cute; I was sold! *laughs*
I dusted the tasteless excess flour off the surface and took a satisfying bite right thru the center. Red bean paste!!! It's been my favorite mochi filling since.

Mochi is the Japanese variant of Chinese rice cake, which, like its Chinese origin, is made of glutinous rice, pounded into paste and molded into shape; however, unlike the Chinese variety, it is molded right after it is pounded, whereas the Chinese variety is baked once again after to solidify the mixture as well as sanitize it. Traditionally in Japan, it is made in a ceremony called mochitsuki. It may also be made in an automatic mochi machine, similar to a breadmaker. In fact, mochi can be made using a breadmaker if the rice is soaked and steamed separately and the machine can be started in a kneading mode. In Korea, a nearly identical food is called chapssaltteok . chapssal meaning "sticky rice," and is also spelled tteok, duk, dduk, duek, or d'uk. (wikipedia)
I had my first attempt at homemade mochi today....it doesn't take more than 10 minutes to make...but forming 6 perfect little round mounds could possibly take more than 30 painful minutes. Fellow Malaysian chefs who find "onde-onde" difficult to make...I suggest you get your mochi from the asian grocer. Haha. It's STICKY...and difficult...I personally feel im alright with handling all sorts of dough, cookie doughs, soft pastes, dumpling making, pastry dough kneading and the like, but making mochi is a different category all together. I wasn't exaggerating with the word sticky in bold....even with fingers, work surface, spoons and palms dusted with tapioca flour, I had difficulties keeping everything neat, pretty and ROUND! Out of frustration, I whipped out my mini muffin pan, dusted it with flour and pushed hot filled mochi's into tiny holes *proud grin* I love how resourceful I am *wink*
1 cup glutinous rice flour
1 cup water
1/4 cup castor sugar
food colouring (if you like)
Pre/home made red bean paste cooked in syrup(store in refrigerator to make it easier to roll)
Beat all ingredients in a bowl with a balloon whisk till free of lumps. The mixture should be runny and pale. Pour mixture into a silicone loaf mold and cover with clingfilm. Cook in Microwave on high for 3 1/2 minutes. Remove and tear off cling wrap. Leave to cool for 1-2 minutes before handling. Dust hands GENEROUSLY with potato flour/tapioca flour before handling hot mochi. Make round balls of ready made red bean paste and set aside to make wrapping and filling more convenient.
Dust rolled and filled mochi's with a light dusting of flour before storing. I placed mine onto pretty paper doilys and made tiny parcels of mochi with some ribbon.Tip: use a clean and dry paint brush to dust off excess flour from surface to neaten.

Tags:

AddThis Social Bookmark Button

Saturday, October 21, 2006

Festival of lights...Diwali

Happy Diwali to Indians worldwide~ and Malaysian's like me finding every excuse to have a festive celebration!

Diwali, also called Deepavali (Hindi: Diwali or Deepavali, Marathi: Tamil: Kannada: Deepavali) is a major Hindu festival. Known as the "Festival of Lights," it symbolises the victory of good over evil, and lamps are lit as a sign of celebration and hope for mankind. The festival of Diwali or Deepawali (literal meaning: lines of lamps) is rooted in the mythological epic Ramayana, and is a celebration of the return of Lord Ram after killing Ravan the Demon during his exile for 14 years. The day of killing Ravan is celebrated as Dussehra (19 to 21 days before Diwali). Celebrations focus on lights and lamps, particularly traditional diyas. Fireworks are associated with the festival in many regions of India.

Diwali is celebrated for five consecutive days in the Hindu month of Ashwayuja. It usually occurs in October/November, and is one of the most popular and eagerly awaited festivals of India. Hindus, Jains and Sikhs alike regard it as a celebration of life and use the occasion to strengthen family and social relationships. (wikipedia)
When the Malays celebrated "Hari Raya"; my chinese family would have a celebration of our kind; charcoal on the barbecue pit, Mah-Jong sets, wine, cards, Karaoke, and the sort! *laughs* I love being Malaysian...and I love my family's take on life and festivity.
Still in tune with my habits from home; I had a little Diwali celebration in my Sydney kitchen.
Milk and Coconut Burfi
1 cup fine grated fresh coconut
1 L milk
3/4 cup sugar
3 tbsp condensed milk
3-4 tbsp ghee (I omitted)
5 cardamom pods
Chopped almonds as garnish
Heat milk and cardamom in a large pot, take it off the stove and cover with lid for 30 minutes. SPoon out the pods. Return pot to stove and add the rest of the ingredients (leave out the almonds). Stir mixture over low heat for about 1-2 hours till mixture turns thick and sticky. Be careful to watch for the milk burning. Try using a pot with a thick base and stirring continuously. When lumpy and sticky, add in the ghee and cook for another 30 minutes. Dish out onto a greased mold/tray or layer with clingfilm (like I have done with mine). Top with almonds and allow to set overnight. Slice to serve.This recipe reminds me of a creamier and softer version of coconut candy I used make in Malaysia.
burfi is an Indian /Pakistani sweet made from condensed milk, cooked until it solidifies. Barfi is often flavoured with cashew, mango, pistachio and spices, and is sometimes served coated with a thin layer of actual silver. Visually, barfi sometimes resembles cheese, and may have a hint of cheese to it. For this reason, barfi is sometimes called "Indian cheese cake". Barfi is popular all over India and is often a part of Indian festivals (wikipedia)
Indian sweets are commonly eaten in small portions as they are meant to be very sweet and intensely rich. These gave me an immediate sugar rush with one mouthful! Haha; I still remember my first taste of Gulab Jamun...it was probably the sweetest thing I've eaten to date! *laughs*
Im visiting an Indian home for dinner to celebrate! *gets excited* Thanks heaps to Pinky's family for inviting Amrit and I over!

Tags:

AddThis Social Bookmark Button

Tuesday, October 17, 2006

Kaya

I spent 3 1/2 hours reading my management notes, preparing dinner and dancing away to music as I stood stirring this precious pot all afternoon.
What's so precious? you ask...
It's Kaya. The word "Kaya" means "rich" in the Malay language, and RICH is definitely a good word to represent its yummy sweet gooey-ness ! In culinary terms, Kaya would be described as a Malay spread of Egg curd/jam.
In Malaysian-student-studying-abroad terms, Kaya= MmmMmmmmm!*YUM!!*

I'm usually all for fast and easy recipes; the type of person who would try cooking/defrosting/baking almost everything in the microwave to see if it works quicker that way! *laughs* I'm still bewildered by how I refused to work that same way this morning. I browsed and took apart 8 or more Kaya recipes online and from books. I tweaked my proportions a little according to reviews and Kaya-making tips available to reduce the sugar and cholesterol levels without destroying the recipes completely.

1 1/2 cup sugar
1 1/3 coconut milk - try to get freshly squeezed milk (canned worked fine for me too *shrug*)
5 eggs (XL size)- use very FRESH eggs

Beat eggs and sugar till well blended. Cook in a slow cooker over low heat. When slightly thickened, pour in coconut milk in a thin stream. Stir well until liquid mixture is thick and gooey. The color should have changed from yellow to a darker shade in 1-2 hours of constant stirring. Look for a recipe you can do in the microwave if you're feeling lazy. Google is gold. *wink*

*sigh* My end product was SOoo VERY satisfying....stirring Kaya in my slowcooker continuously for hours was frustrating but there wasn't any other way to achieve deliciously smooth, silky Kaya!I decided to share my Kaya with several Malaysian friends who lived nearby to try making it worth my trouble. I would eat my Kaya on a slice of toast for breakfast in the morning; but I wouldn't touch Kaya out of jars available at Asian supermarkets...
After having a go at making my own; and shivering at the cup loads of sugar....I wonder what goes into manufactured Kaya which tastes a WHOLE lot sweeter and is BROWN....mine is yellow...cup and cups of sugar caramelizing was done to achieve its dark rich color. *shudder*
I made several strips of butter-y puff pastry as a delicious accompaniment to our freshly made Kaya. Dessert was simply divine!...*sigh* heavenly....*licks lips*

Tags:

AddThis Social Bookmark Button

Thursday, September 28, 2006

Sweet potato Onde-Onde

It's been awhile since I've acknowledged my Malaysian Heritage in my blog entries. I'm extremely proud to be Malaysian...I love it for all its unique features and the many opportunities it's given me in terms of exploring cultures and most importantly; palate and flavors! The countless Indian spices, numerous Malay delicacies and impressive cooking techniques from the Chinese. Imagine all of them assimilated into one... and you have = Malaysia. Through the many centuries of living amongst other races; we've learnt to appreciate and incorporate various culinary inspirations to create authentic "Malaysian" dishes of our own.

ONde-Onde (pronounced: ohn-day, ohn-day)


I'm not certain how the name "onde-onde" came about...but I'm pretty sure it's origins are Malay. My sister and I used to call them "bombs".....i vaguely remember the reason being how they "exploded" with sweet syrup from the center in every bite.I took a 2 hour hunt in search of freshly grated coconut and returned home with none. I was disappointed to find that EVERY asian store I came across only stocked frozen strips of coconut, "You want GRATED?....you buy dessicated!" said the Vietnamese lady. And so I did.

Yan; my most dearest bestest buddy in the whole wide wide world! brought this to my attention. An ingenious idea by Carnation; coconut flavored evaporated milk! YAY!!! Good riddance to unhealthy portions of coconut milk + cream; I have found my waistline-friendly substitute.

10 oz sweet potato peeled, cooked and mashed
2 1/2 cup glutinous rice flour
1 tin Coconut flavored evaporated milk
250gms desicated coconut (use freshly grated ones if you're lucky enough to find a bag)
3 pandan (screwpine leaves)
1 tsp salt
1 large chunk of gula melaka (Coconut palm sugar) chopped roughly
Blend pandan leaves with 1/3 tin of evaporated milk till leaves are complete ground. Mix mashed potatoes, flour and pandan mixture in a large bowl and knead till it form a workable dough. Add a little more milk if needed. Pour excess milk in a large deep bowl and empty the bag of dessicated coconut in. Sprinkle in the salt and toss well to combine.

Make onde onde balls by rolling them into tiny balls and pressing a piece of palm sugar into the center. Pinch the sides to close and roll them back into shape. Cook onde onde in batches of 6-8 balls in boiling water over the stove on medium heat. They float up when they are cooked. Strain and coat with coconut. They are best eaten warm.*sigh* How I wish I found grated coconut...it would have been sensational!
I was tempted to grab a fresh shell and grate it with a fork myself! *sigh* desperation does these things to you. *laughs*
Skip " mixing excess milk + coconut" step if you're using it freshly grated. I did it to help moisten the dry dessicated coconut grains.

Tags:

AddThis Social Bookmark Button

Monday, September 25, 2006

Reduction

Definition:
Re-duc-tion (cooking):
n.
Technique to decrease volume of a sauce through evaporation. Stirring liquids in a pot over the stove till the cows-come-home.
*sigh* Reducing sauces and jams are my biggest kitchen fears! Being the impatient person that I am; standing and stirring the same pot for more than 2 hours could mean death! *laughs*
I had to find another way to keep my hands busy in the kitchen while my pot of onion jam bubbled over gentle flames. I gave an old fail-ed recipe another go, just to see if it was the proportions which were inaccurate or was it from my meager bread baking talent. 3 hours after....I concluded it was the recipe; not me! *grin* The olive loaf had suspicious proportions of flour+water and after extensive research online from various recipes; I decided it was best to try a different composition the next time. It was still edible; just didn't turn out the way I wanted it to.
I sliced the loaf and topped it with roast chicken, mayo, chopped lemon thyme and the yummy jam for dinner. The girls didn't like the jam too much; they thought it was too 'strong'-i have no idea what they meant by strong. It could be that they were unacquainted to the robust flavors of red wine + onions. I personally loved it! It was really sweet...I had to use it scarcely on the open sandwiches. I'm glad it stores well. I'll probably pop it in a jar till the next time I make lamb steaks...MMMmmmmMmm..it should go perrrfectly!

3 large onions sliced thinly(preferably white; I used brown one's and they turned out fine)
Dry red wine enough to cover all the sliced onions in the pot
2/3 cup white sugar
3 cinnamon sticks
2 star anise cloves
Cook everything in medium thick base saucepan on low heat till the liquid is reduced to a clump of sticky yummy jam! It took me 3 hours....I wish you luck :)


Tags:

AddThis Social Bookmark Button

Sunday, September 24, 2006

BLueberry Beso's

It's been awhile since I woke up to an empty "schedule". I was thrilled! couldn't wait to bake "just-for-fun" *grin*. Despite being extremely deprived of sleep from activities the previous night; I was enthusiastic to hop straight into my favorite apron.
It seems like forever since I baked spontaneously; without pre-decided "combinations" or specific inspirations. This morning; I swung my fridge open and dug in deep into the fruit shelves to find scraps for a fun *experiment*. I mixed and matched...poked, cleaned and threw out several things I dug up and finally picked the winners(closest to being inedible). Fruity and sweet combinations always seem to get my days started with a smile! hehe.

Blueberries+Pear
I brainstormed a couple of possible variations...
1. A berry "bread"
2. A sponge cake topped with fruits
3. Moist and fruity butter bundt mini-cakes
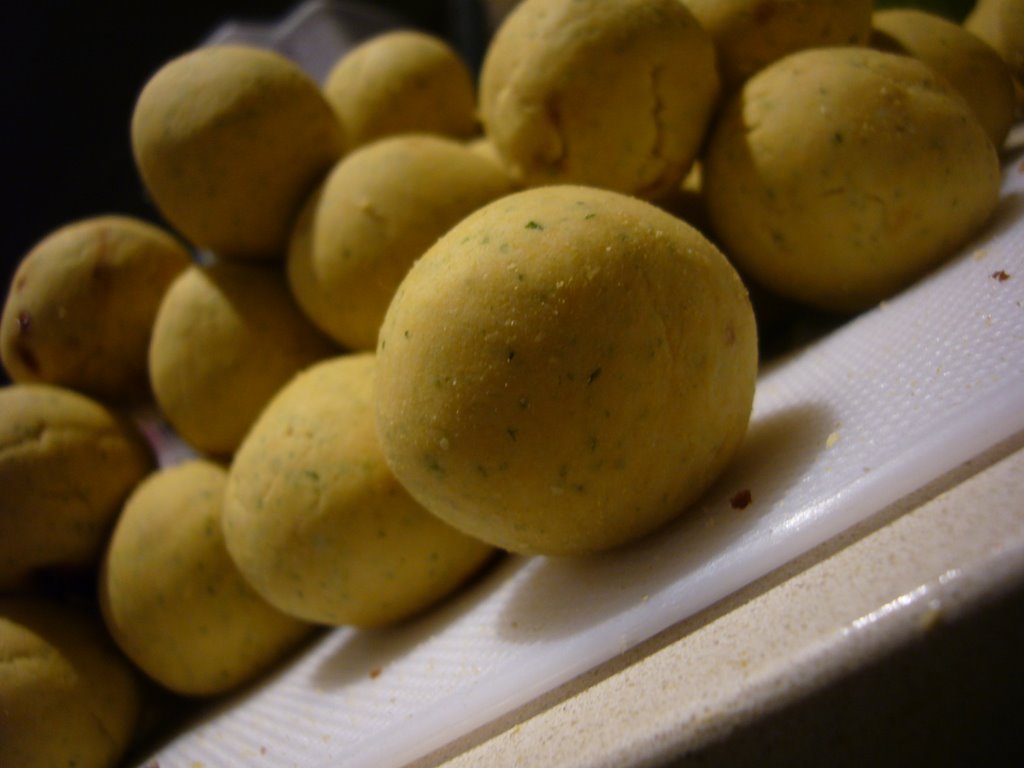
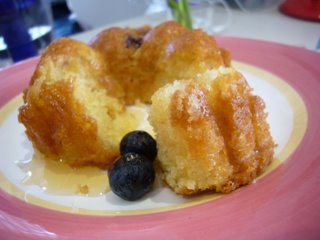
I went for the most indulgent option. A dense almond meal mini-cake. I convinced myself it wouldn't kill my diet completely. Reason be; I've cut the recipe in 1/2 and made them into tiny portions. *giggle* I know...I know...I know I'm in self denial. *laughs*
Pears are really good in rich cakes as it gives them a good texture balance and creates an interesting mix to the blueberry bits in between each bite.
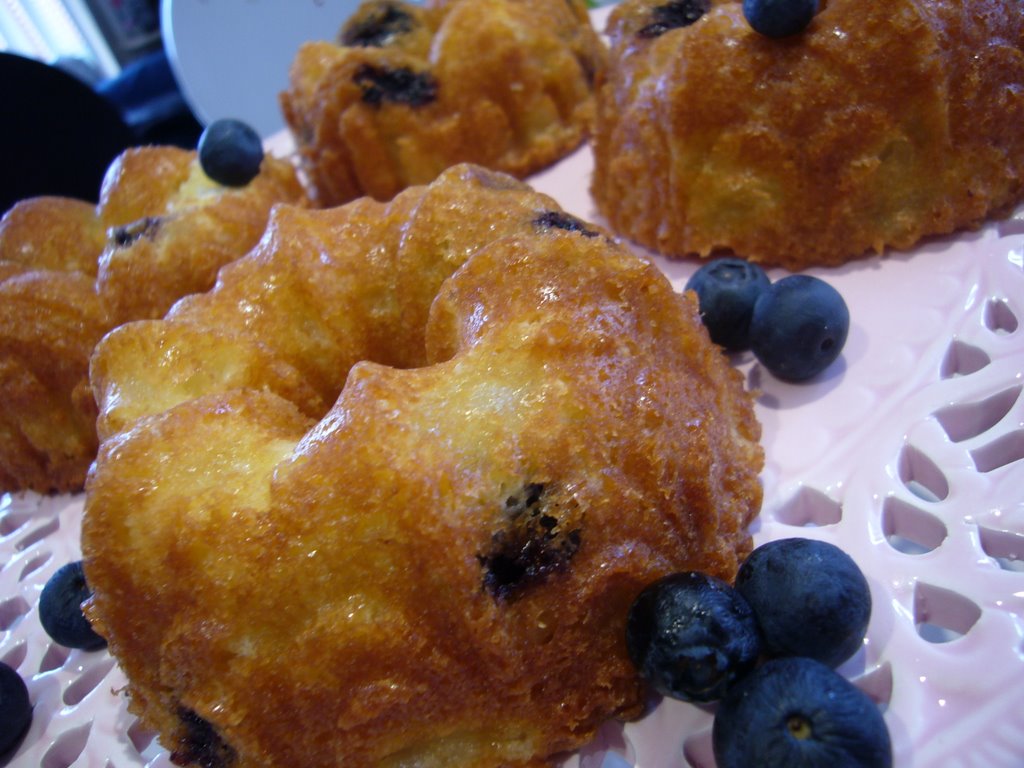
I had a hard time coming up with a name for these tiny golden bundt shaped blueberry+almond muffins. "Pear+Blueberry+Almond mini-bundt-cake-type-thing" would sound extremely retarded! Haha Kudo'z to my multi-cultured "Chef" dude; "Lil" Steve-y for the perfect name for them. 
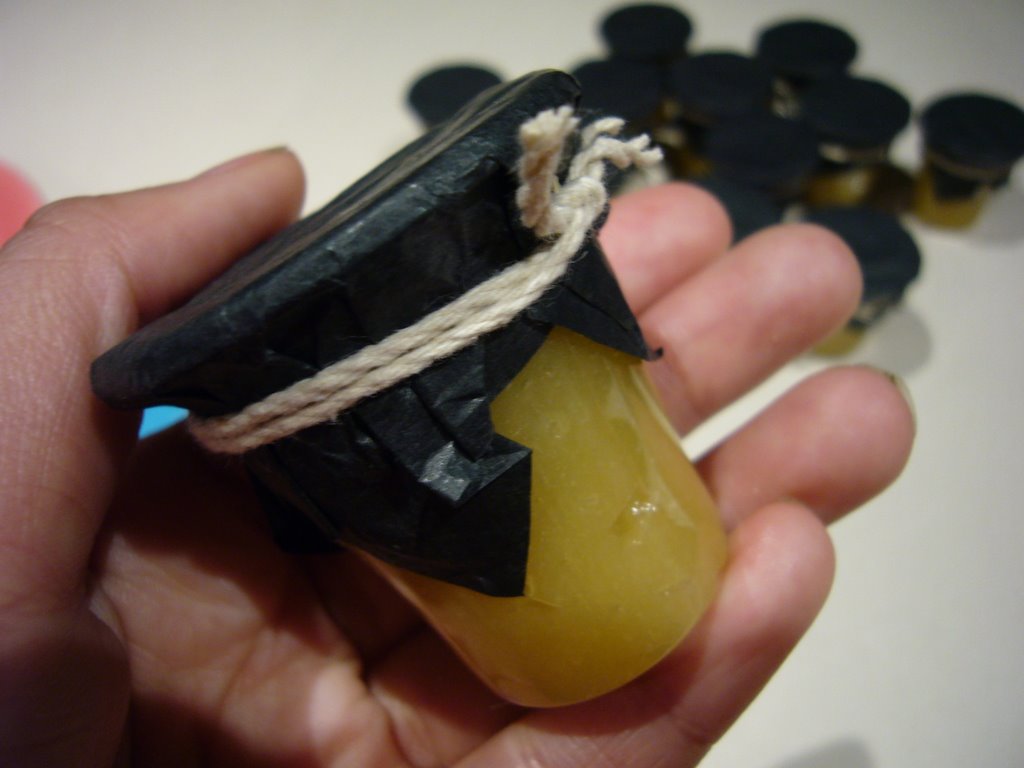
"Blueberry Beso's" . Beso is Spanish for 
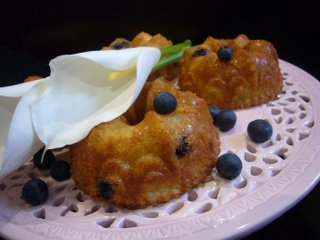
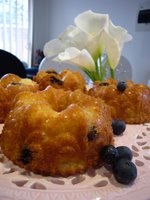
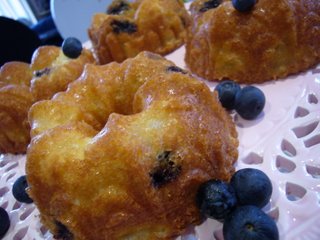
Kisses...and the name fits them perfectly! Fresh blueberries hidden in a soft, moist and delicate buttery sponge bundt, glazed with a sweet tinge of pear and subtle scent of vanilla...MmMMmmm *flutter's off*.....Doesn't it remind you of a kiss?...fruity one of course *wink*
Makes: 6 mini bundts

160g butter softened
1 tsp vanilla essence
3/4 cup castor sugar
1 XLarge egg
1/3 cup plain flour
1/2 cup self raising flour
1/4 cup almond meal
1/2 cup fresh blueberries
1 over-ripe packham pear peeled and diced into small cubes


Cream butter, vanilla and sugar till fluffy and well combined. Add in egg and beat for another 1 minute. Add sifted dry ingredients and fold in. Add fruits and gently incorporate. Spoon into lightly greased tins. (Use large cupcake cases if you like). Bake in preheated 180degree oven till surface is golden and centers are cooked through. Flip them out onto a wire rack to cool slightly. Serve with drizzles of honey / or a generous dollop of freshly whipped cream. YUmmmMMmm...serve warm and fluffy, fresh from the oven.*
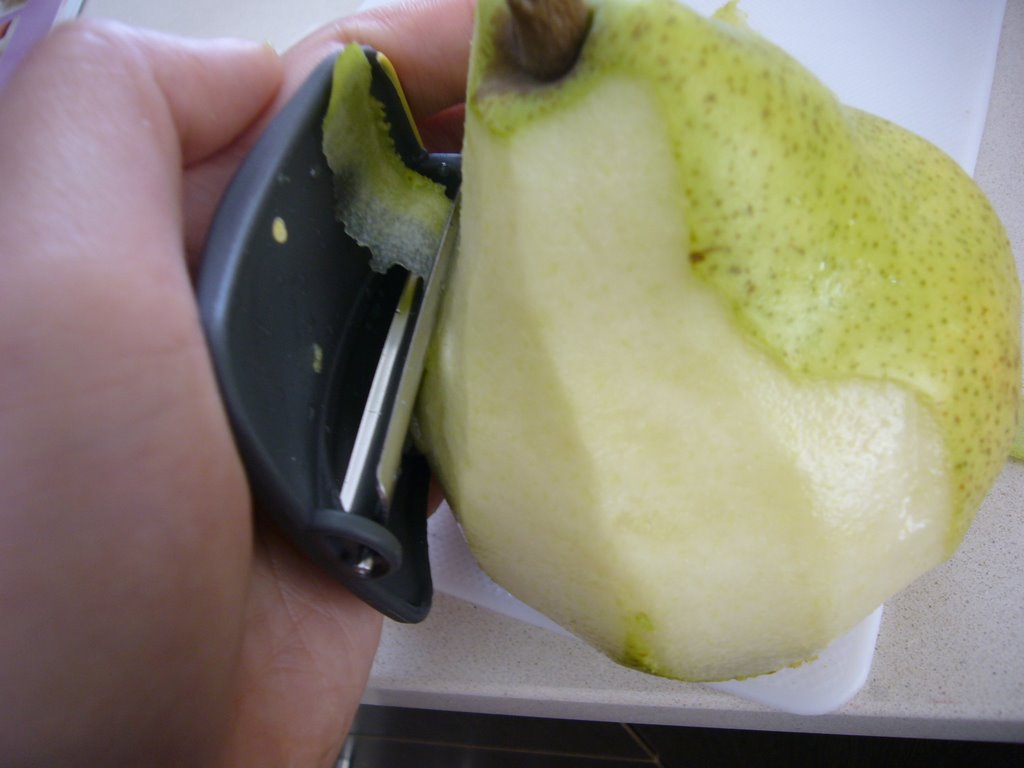
I bought a cool new vegetable+fruit peeler which works like a chARM!...love it to pieces! It's cool how its attached to my palm. It makes me feel like the "peel"-master! *faints* My apologies for the lame-ness of that comment...I'm full of shit! *laughs*

*Thanks to Eunice from the Malaysian ADnD for the bunch of pretty lily's! I just had to capture them in a shot before they began to wilt :(. Great work with the table settings! It was really pretty. Big thanks and *hugs* to Lyn and "Beverly" as well; a simple "hey" has motivated and inspired my "blogging" more than you can imagine! A complete loss for words. Thanks guys.


Tags:

AddThis Social Bookmark Button

Saturday, September 23, 2006

Melon and Kiwi Parfait

You’ve heard it before: “Breakfast is the most important meal of the day.” Ever wonder why? Breakfast is important for refueling your body after a night’s sleep. And for those who are trying to lose some weight, sitting down to a healthy, high-fiber brekkie could be the key to success!

One of my favourite morning meal would be Fruit Parfaits because they look cheery and so simple to prepare. hee...

To serve 4, you need:
a. 1 cup rockmelon cubes
b.
3 kiwi fruit, peeled and cut into wedges
c. 400 g low-fat vanilla yogurt
d. 4 tablespoons toasted muesli

Method: Layer fruit, yogurt and muesli in 4 tall glasses. Easy and no-fuss!

Variation: Use any fresh fruits that are in season so that it'll be cheaper. Also, replace toasted muesli with cornflakes if you like.

That's all you need to be well on your way to a daily helping of energy and good health! =)

Tags:

AddThis Social Bookmark Button

Monday, September 18, 2006

It's semester break - treat yourself with a nice (piece of) cheese cake!

As my debut post on studentsonabudget, this recipe is specially dedicated to rich-textured-cheese cake lovers.

So we are on a budget doesn't mean we can't treat ourselves with nice food. The cheese cake recipe I am sharing is my most favourite baking recipe ever. Why? It's easy, cheap and as good as those you bought from cafes! (even tastes better than some cafes'!)

New York Cheesecake!

Here are what you need:

  • 375g cream cheese (I tried out a few brands, turns out Kraft's Philadelphia works the best)
  • Approx 70g sugar
  • 2-3 eggs (depends on size; separate the yolks and whites)
  • Butter (if you don't mind poor presentation, you don't even need it, it's just for greasing the bake-ware)
  • Oven
  • 8-9" round-shaped bake-ware
  • Whisk (or an electronic beater can always save you from sore arms)
That's it! You don't even need flour!

And before we start, please make sure everything is at room temperature.

During the preparation, we will create two batters: the cheese batter and the egg whites)

Ready? Here we go:

  1. Pre-heat your oven to 180 degree celcius
  2. Start preparing the cheese batter: Beat the cream cheese until smooth. During the process, add the egg yolks one by one to help. Also add half the sugar (35g) into this batter.
  3. Set the cheese batter aside, start preparing the egg white batter: Beat the egg white until it stands (at the perfect state, it should stand so still that it won't even fall out from the bowl if you flip the bowl upside-down) then, whisk the remaining sugar (35g) into the egg whites too.
  4. Then, FOLD the egg white batter into the cheese batter.
  5. Pour the mixture of two batters into the greased bake-ware.
  6. Pop it into the oven and wait for around 35-45 minutes. (depends how brown you want)
Ta-da! That's it. With less than 10 bucks you can make a yummy cheese cake that can serve 8 people a yummy treat (or indulge yourself for a whole long day) so why pay starbucks 5 bucks for a piece?

Technorati Tags: ,

AddThis Social Bookmark Button

Tuesday, September 05, 2006

butterscotch pancakes


if i were ever to make breakfast in bed for someone , pancakes would be ideal . you could score some points with your loved one by making them from scratch eh ? the ingredients are cheap , they're too simple to make , they taste sinfully wonderful and they're great for light meals as well :

what you need ar?

for the pancake :

1 cup plain flour (measured after sifting)
2 teaspoons baking powder
1 egg
1 cup milk
2 teaspoons of melted butter

for the butterscotch sauce :
2/3 cup brown sugar , lightly packed
2/3 cup cream
2 teaspoons of butter
a dash of vanilla essence (optional)

how liao ?

in a bowl , mix the flour and baking powder well . crack an egg into the mix and stir some more . add the milk and whisk to a near smooth consistency (minimize the flour blobs hor but don't need to whisk until blobs aren't visible anymore lor ) . for a final touch to the batter , add the melted butter (you can do this just by melting butter in a teaspoon over a stove hor) . give it a final whisk and you're batter's ready lor .

to prepare your the pancakes ar , simply line a pan with butter and fry about four tablespoons of batter per pancake over a low fire . flip when they seem easily mobile (not stuck to the pan lor) . it should take no more than 40 seconds per side hor . the batter should provide you a six pancake stack with just a tablespoon to spare . just nice for two people (or one of me) .

for the sauce , simply heat the brown sugar , cream and butter in a pan for at least five minutes over a low fire (same fire as for pancakes lor) . it should have a nice creamy consistency and leave your house smelling all sweet and heavenly . turn off the fire and add the vanilla essence , watch it sizzle and enjoy the fragrance . pour the sauce over your pancake stack liao .

serve with scoops of ice cream if you want (like i did with my experimental batch awhile ago) :


i bet you're drooling already aren't you ?


Tags:

AddThis Social Bookmark Button

Wednesday, August 09, 2006

mini strawberry tarts


from my recent recipes , most people might misintepret me as someone who only relishes in greedily gobbling inhumane portions of food . that is just a misconception hor . i am also well known as an epitome of sweet toothed individuals . i delight in desserts as well . a few weeks back , i happened to catch a show on tv where the chef made a simple raspberry tart . what struck me was not only its tempting appearance...but her ingenuity . so , here , i try to recreate her simplicity with strawberries (only because it's still winter here and they're hardly any other fruits to work with...if any ) .

what you need ar ?

100 grams mascarpone cheese .
100 ml thick cream .
2 teaspoons caster sugar or 2 tablespoons sweetened condensed milk .
juice of half an orange ( i used a navel orange )
3-4 strawberries (depending on their size...mine were giganormous) .
3 large round digestive biscuits ( i used mcvities chocolate digestive cookies ) .

the measurements above make three to four mini-tarts .

how liao ?

in a bowl , whisk the mascarpone cheese , cream and sugar / sweetened condensed milk together . dice one strawberries per intended tart ( i.e. three in this case ) and add those along with the orange juice into the mix . whisk more to ensure everything's well mixed but not to the point where you mash the strawberries hor . if you aren't confident on being gentle , then forgo the whisk . just use a spoon lor . next , just plate the mixture onto your biscuit bases . decorate with quatered stawberries atop each mini-tart . refridgerate for some time and serve chilled . enjoy .


Tags:

AddThis Social Bookmark Button

Sunday, August 06, 2006

Spanish Doughnuts


The bake-ress is back!

Yes. Shameful, I know. But the minute I moved house and got uprooted from my beautiful (rented) SMEG microwave, oven and stove top, I just lost motivation because I had to bake in a less posh oven.

But oh well. I'm back.

:)

So today's long due recipe is Spanish doughnuts.

Those who know me well know that I detest crowds and there's nothing worse than lining up at Vic Mart with hooligans, err, I mean, market-going folks on a Sunday afternoon to get a sugar high.

So here's my version of Spanish doughnuts for those who hate queues and those who are a bit more health conscious (I've made the effort to reduce the cholestrol in this recipe).

Baker's pantry:

1/2 (110g) cups caster sugar
1 teaspoon vanilla extract
1 egg
20g unsalted butter (melted)
1/2 cup (125ml) milk
1 1/2 cups plain flour
1 teaspoon baking powder
Canola oil for deep frying

sugar mixture: 2 cups (450g) white sugar, 3 teaspoons ground cinnamon, 1/2 teaspoon nutmeg

Flour up to my elbows:

1. Whisk sugar, vanilla extract, egg, butter and milk.

2. Add flour, baking powder and 1/2 teaspoon of salt. Stir until smooth to form a thick batter. Leave for one hour.

3. Fill a wok or deep frying pan with oil. Heat oil until 180 degrees. To test this, use a deep fryer thermometer or plonk a small cube of bread into the oil. If it's already at 180 degrees, the bread cube will turn golden in 30 seconds.

4. Fry teaspoonfuls of batter. Ensure that the batter that goes into the oil is more or less teaspoonful size to avoid them looking like giant warts. Place fried up batter on paper towels.

5. Toss doughnuts in the sugar mixture.

6. Serve immediately (if you plan to eat them later, don't roll them in the sugar mixture yet).

Spanish doughnuts are perfect with a hot mug of tea!

Tags:

AddThis Social Bookmark Button