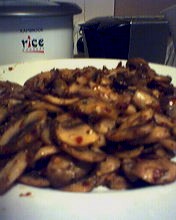
Google

Thursday, November 23, 2006

Nak Ji bo Kum

"AhnYoOng-ha-sa-yoO"~ yes...my spoken Korean has been improving *proud grin*
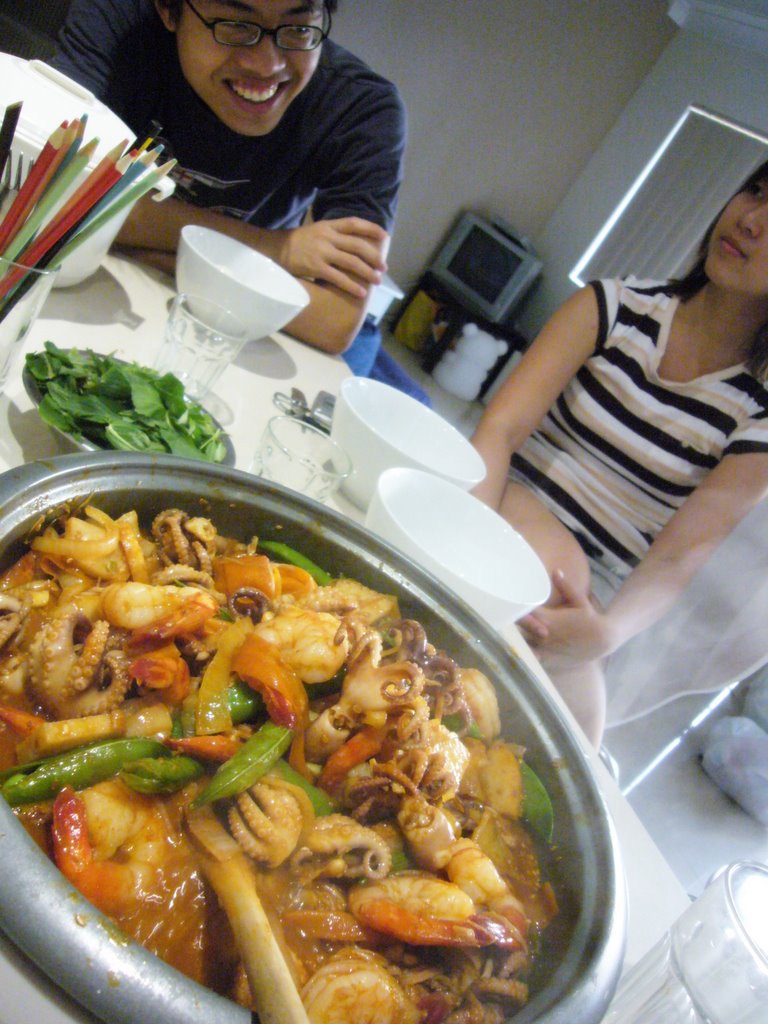
I took a brief break from cramming my lecture notes for a small dinner party last night. I put 3 willing+eager UNSW students to the true "Malaysian test" -- "How spicy do you like it?" Us Malaysian youngsters have a relationship with spicy food; from the usual spicy red chilies, curries, sambals and our favorite killer-hot birdseye chilies; but Koreans;......they take spicy to a whole different level.
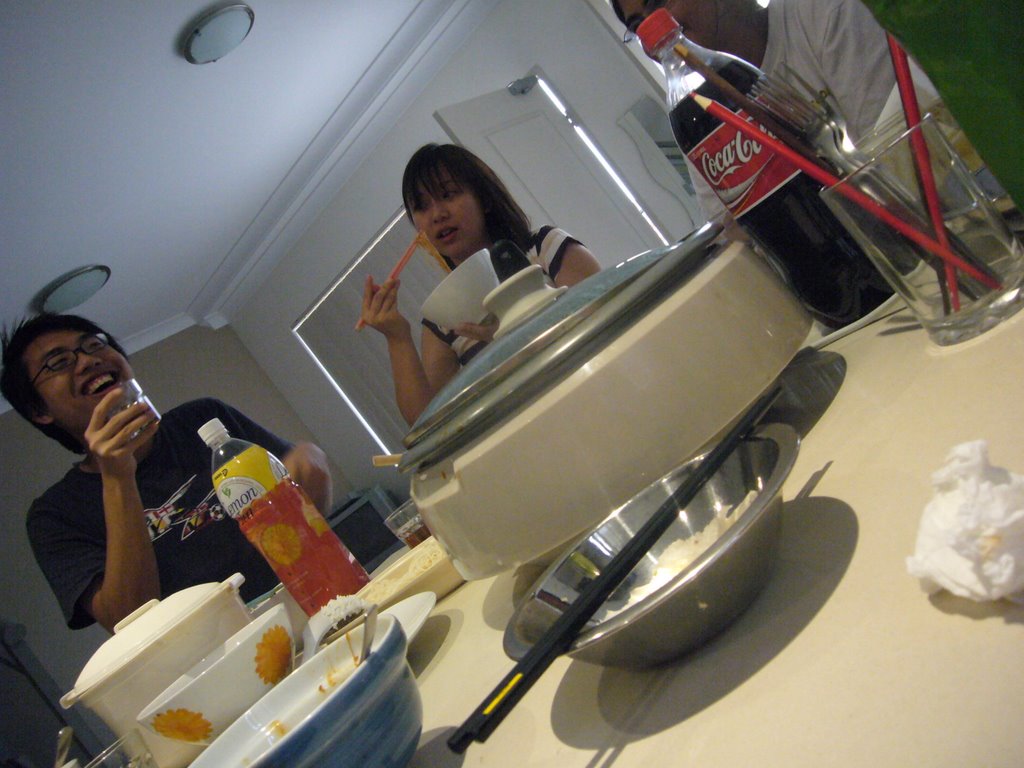
You can tell it's heaps of 'fun' when the tissue box is pulled out and the sound of giggles, sniffles and slurps fill the table. Suffering with joy...I would say. *laughs* I don't mean to torture my guests...but COme-On~ just look how much they're enjoying themselves! *grin* I didn't want to be the party-pooper holding back on the chilli powder. *wink*. Qimyi + the 2 housemates of very Indian roots (Pinky+ Amrit) were 'A-o-kay'. Pretty lil Amanda, "Viking" and I had a slight struggle with the sniffles...but I would do it all again just for another scoop of that fiery-hot broth. *MmmmMmm*...
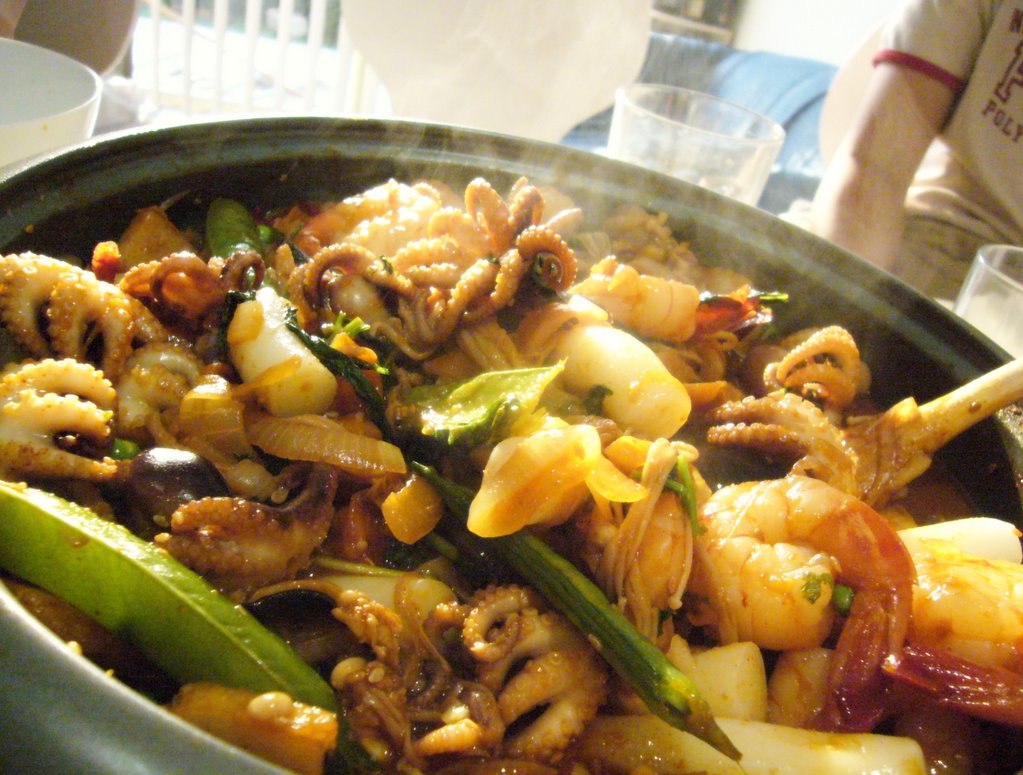
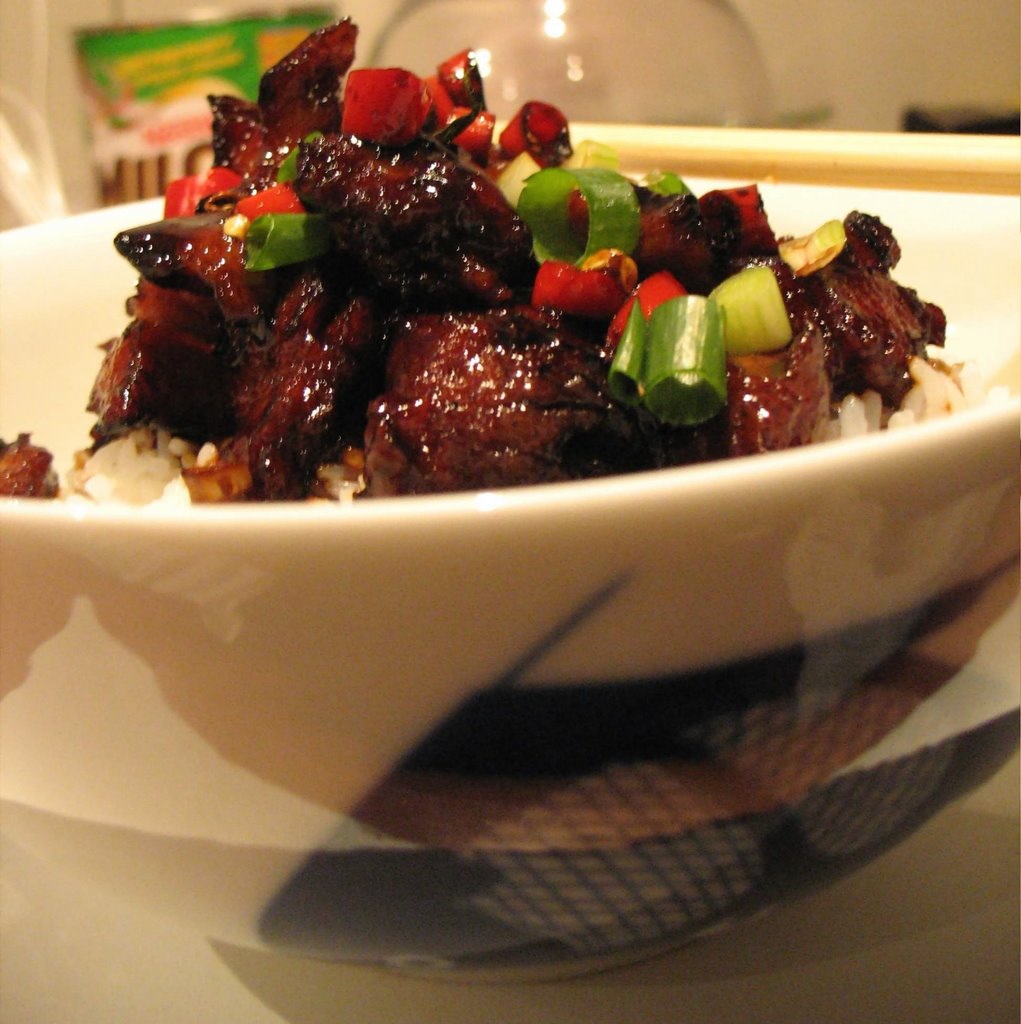
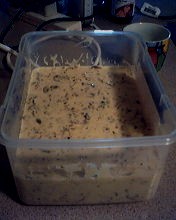
I remember the question "What are we having?" being continuously repeated through the evening. I was consistently replying; "Nak ji Bo Kum" but I guess it was hard for everyone to register/comprehend what those four strange sounding syllables were. I finally gave up with a lazy answer I made up in English: "Spicy octopus-thing". I honestly didn't have a clue what Nak ji bo kum meant myself... well..not until I checked it out online this morning *grin*

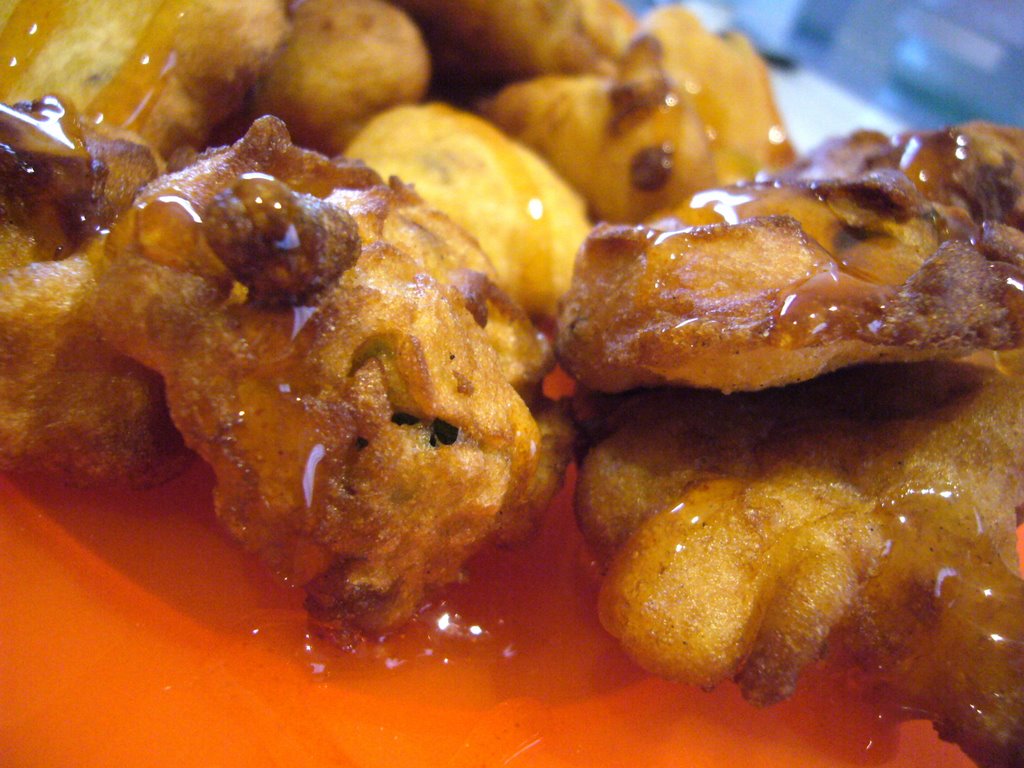
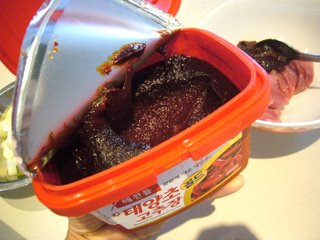
Nakji Bokum is a very spicy octopus dish enjoyed by many Koreans. Octopus tentacles are cut into bite-sized pieces then pan stir-fried with spicy kochujang paste along with chili powder, sesame oil, red or green chili peppers, green onions, carrots and onions. Different variation of this dish do exist as the octopus can be substituted with squid for less chewy texture and taste. Non-Koreans may find this dish too spicy even diluted with rice that accompanies this dish. (www.trifood.com)


Here's the recipe for those interested in having a go at this devilishly hot dish. Having it with a bunch of friends is so much more enjoyable...reminds me of noisy Chinese hot-pot nights. I do however feel a need to add a tiny warning to those who share bunks/roommates ... digestion of excessive spicy food often creates an unwanted amount of gas during the night *blush* :P
1lb octopus defrosted
1/2 lb frozen tiger prawns
2 onions chopped into thin rings
1 carrot sliced into thin strips (Use a grater for beautiful carrot curls)
1 large pack Golden enoki mushrooms
1 bowl sugar snap peas
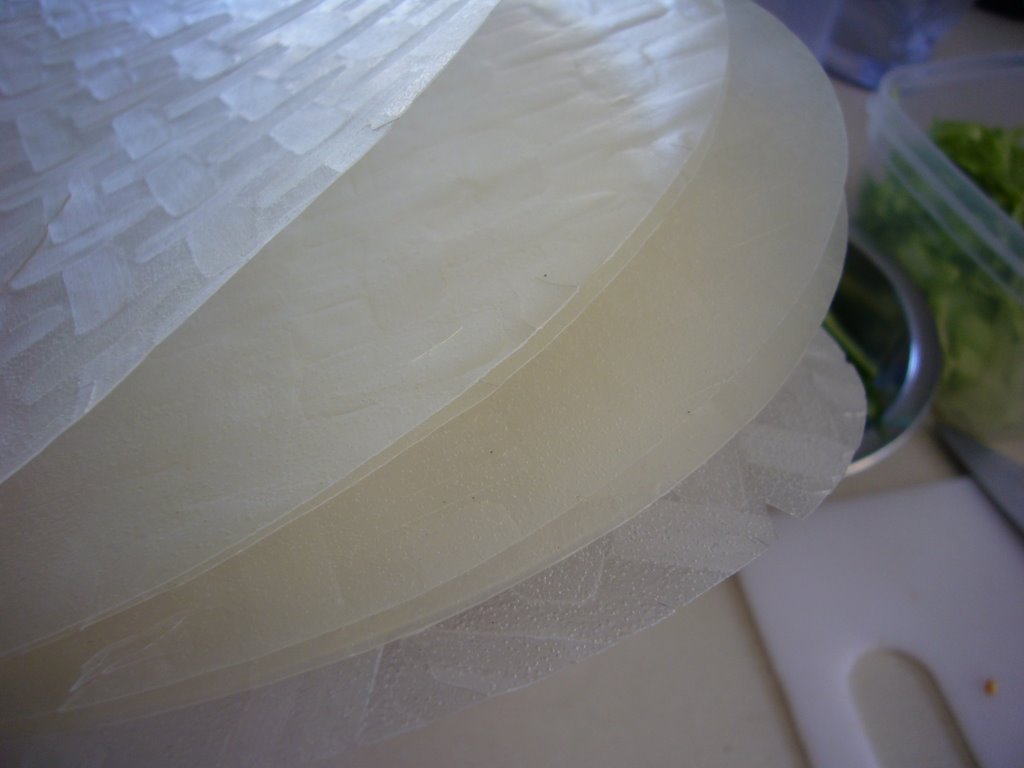
1 pack korean rice cake (sticks)
3 stalks mint leaves plucked
2 stalks coriander leaves roughly chopped
1 slab asian fish-cake diced into fairly thin pieces
1-2 tbsp sesame oil for stir-frying

Sauce: 3 tbsp Go chu jang (Korean chilli-paste), 2 large cloves garlic diced fine, 2 heaped tbsps honey, 4 tsp fine chilli powder(less if you like), 2 tbsp sesame powder, salt to taste(about 2 tsp).

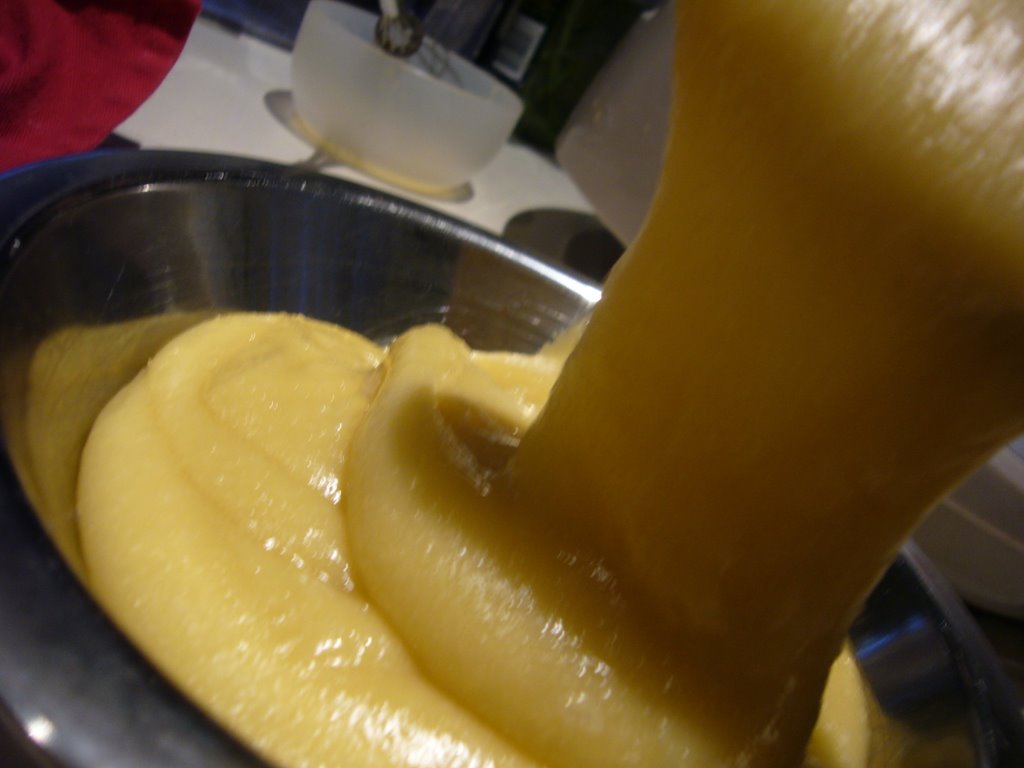
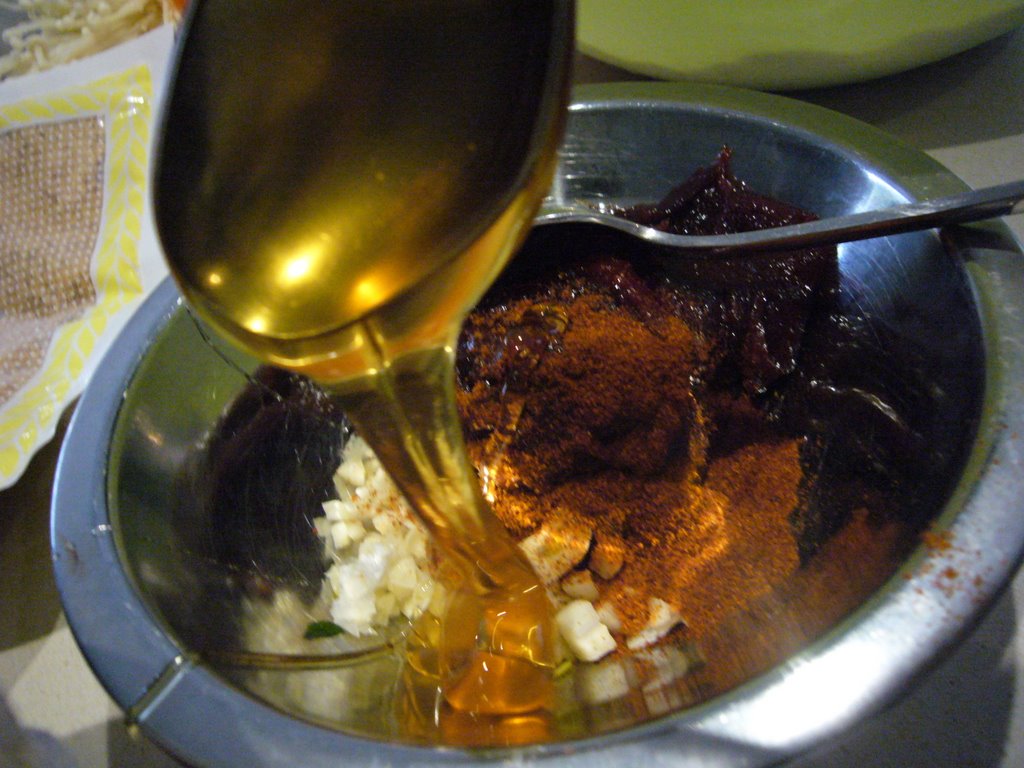
Mix all ingredients and combine with washed octopus. Leave to marinade for at least 30 minutes to an hour.
The cooking process is fairly simple. Heat the oil in a electric multi-cooker on medium heat, add onions, fish cake and vegetables. Saute till fragrant and fairly softened. Dump in the octopus mixture and give it a good stir. Pop the lid onto the cooker and leave to simmer for 2-3 minutes. Add the prawns in and cook till the seafood is fairly cooked. The sauce should have increased by 1/2. The octopus releases moisture when cooked. When the prawns are pink, add in the rice cake sticks and the green herbs. stir well and replace the lid for another 1-2 minutes. Serve with lots of white steamed Japanese rice/Korean sweet rice or "somen" noodles if you like.
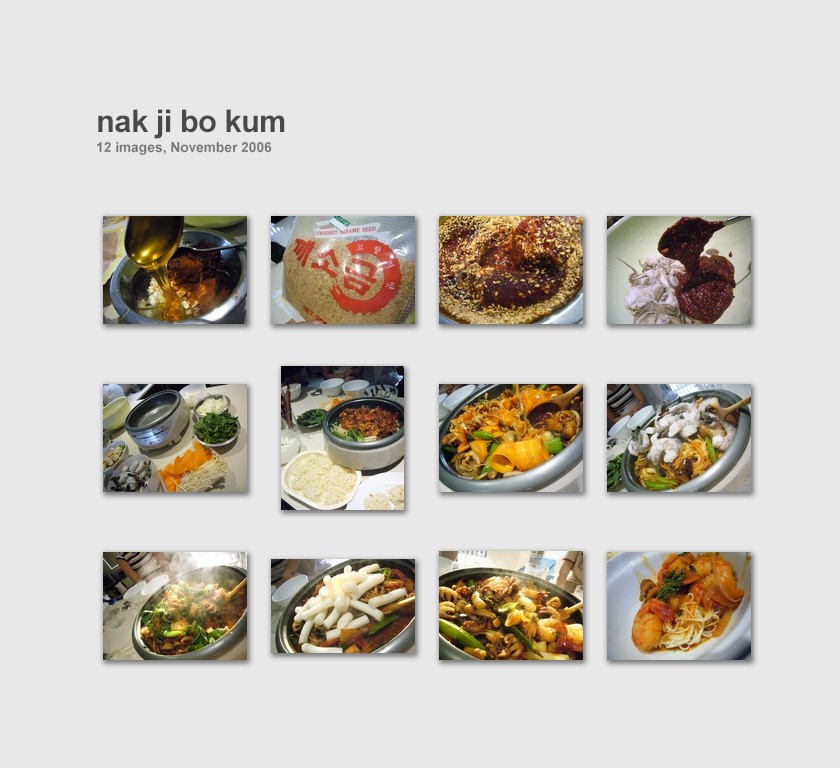
I gently blanched and cooked the noodles in boiling anchovies+ garlic stock earlier that evening; ran the strands through cold water and made small noodle servings to go with the spicy octopus broth. I personally prefer having it with noodles...but the boys seemed to like the rice with it too. This dish eaten with Rice is refered to in Korean as "Nak Ji Bo Kum Bop"
Thanks everyone for coming over for dinner...it was a lots of fun, for me at least; I bet it was too for those who've already finished their exams~ *grrr*...I still have that last paper in the morning tomorrow; and it's off to Melbourne for me~~ CANt WAit!! *excitedly skips around the room*

Tags:

AddThis Social Bookmark Button

Friday, November 17, 2006

Brownies!

If you’re a brownies-fan, here’s one recipe you absolutely got to try! Chef Roland's ( White House executive pastry chef) recipe is a killer that can kill two birds with one stone- simple preparation and delicious taste. It’s not difficult to make and require few basic ingredients.

Comment:Well wrapped brownies in plastic wrap, unglazed and uncut will keep in the freezer for up to 2 months. Perfect for studies who need a quick chocolate fix! ;p I made 2 styles- one in a mini loaf pan for a friend's birthday and another batch in muffin cups, glazed with chocolate frosting.

Ingredients:
10 Tablespoon unsalted butter, softened
1 ¼ cup sugar
3 large eggs
1 large egg yolk
1 tablespoon pure vanilla extract
Pinch salt
5 Tablespoon unsweetened cocoa powder
1 cup all purpose flour
1 1/2 cup pecan pieces

Directions:
1. Preheat oven to 400 F. Grease a 9 x 13 inch baking tray and line the bottom with parchment paper
2. Cream the butter and sugar together until fluffy, 2-3 mins. Add the eggs and egg yolk one at a time and beat until smooth, scraping down the sides of the bowl after each addition. Add the vanilla, salt and cocoa powder and mix well. Beat in the flour until well combined. Stir in the nuts
3. Scrape the batter into the prepared pan and smooth the top with a spatula. Bake for 10 mins.

* For fudgy brownies, remove the pan from the oven and tap it on the counter to make the rising brownies collapse. Return the pan to the oven and bake until firm to touch)
* For cakier brownies, bake 18-20 mins without interruption.

Tags:

AddThis Social Bookmark Button

Saturday, November 11, 2006

Hush Puppies

Monthly food magazines often spark creative ideas in my kitchen. They bring to my attention what's fresh, in season, matching herbs/ingredients and educates this little amateur cook about storage, food handling tips and a wide range of various food cultures. This month, the GoodTaste magazine introduced Creole cuisine. I was thrilled!! "Creole" was a new term for me..but as I flipped through the pages I recognized it's native dishes such as the Jambalaya, Cos Chef salad and crab cakes! I've had them before...just never knew where they came from!
A strange learning habit I have is to "Google-it" whenever I craved more information...
I google everything..... i mean...EVERYTHING! LOL
Wikipedia is probably one of my favourites too.
Here are snippets of what they had to say about Creole culture, background, cuisine and its origins.

The term Creole and its cognates in other languages — such as crioulo, criollo, créole, kriolu, criol, kreyol, kriulo, kriol, krio, etc. — have been applied to people in different countries and epochs, with rather different meanings. Those terms are almost always used in the general area of present or former European colonies in other continents, and originally referred to locally-born people with European ancestry. However, this original meaning has often changed over the last five centuries, and in many cases the term has come to designate some distinct local ethnic group — often, but not always, of mixed European and native ancestry.

In Spanish-speaking Latin America, the word criollo (cognate and closest equivalent of Engl
ish Creole) generally refers to people of unmixed European (typically Spanish) descent born in the New World. According to the Spanish caste system, people with European and indigenous origin who possessed 1/8th or less of Amerindian ancestry, were also considered criollos (unlike people with mainly European and some black African ancestry, who were deemed to be mulatto or mixed-raced regardless of their percentage of white ancestry). In any case, the expression Spanish American criollo is only applicable to people born in the New World. Throughout the colonial period, a caste system was effectively in force, where the local-born criollos ranked strictly lower than governing peninsulares ("born in the Iberian Peninsula"), despite both being of European ancestry. By the 19th century, this discrimination eventually led the criollo to rebel against the Spanish rule. With the support of the even lower classes — castizos, mestizos, cholos, mulattos, amerindians, zambos, and ultimately blacks — they engaged Spain in the Mexican War of Independence (1810–1821) and the South American Wars of Independence (1810–1826), which ended with the break-up of former Spanish Empire in America into a number of independent republics.

The word Creole may refer to

  • a person of Spanish (or French or Portuguese) ancestry but born in one of the Spanish (or French) colonies, as opposed to a Spaniard (or Frenchman or Portuguese) born in Spain (or France or Portugal)any of the Creole peoples,
  • a number of distinct ethnic groups in various countriesa creole language
  • casual reference to mean "pertaining to New Orleans" or aspects of its culture
What I love about Creole cuisine is its fusion of tantalizing flavours from French, Spanish and African influences. It reminds me of food-from-home (Malaysia) where it's a jumbled combination of Malay, Chinese and Indian flavours. The cultures, food preparation techniques and eating etiquettes are so different, but yet the different flavours have been carefully and creatively harmonized to create a separate cuisine type of its own. According to the magazine, Creole food originated from New Orleans. A huge pat on the back for the creative geniuses whove finally came up with something made from Polenta that I LOVE! ....seriously...like WOW... Those who have been following my torturous attempts of learning to enjoy polenta through the many months will probably understand. TRY THIS RECIPE! ....I'm not kidding.....I was blown away.... *wink*
HUSH PUPPIES
2/3 cup fine grain polenta
1/3 cup plain flour
1 tbs cornflour
1 tsp baking powder
1/2 tsp salt
2 green shallots finely chopped
1 tbsp dried chilli flakes
1 egg
1/3 cup buttermilk
Vegetable oil to deep fry.
Combine dry ingredients in a bowl. Add egg, milk and beat lightly with a balloon whisk to combine. Heat oil in a deep saucepan on medium heat. Dash in 2-3 grains of salt to check for a fizzle when the oil is hot enough. Reduce your stove flames a little and carefully drop spoonfuls of batter into the oil 3-4 at a time (Don't overcrowd your pan). Flip them gently in the oil till theyre golden and crisp. Should take less than 5 minutes each turn. Soak excess oil on a paper towel. Serve piping hot!

....and if you're eating with Malaysian students...drench the pile in maggi chilli sauce *MMmMmmmmm* HAha! ... this household is hopelessly Malaysian to the core. *blush*

Tags:

AddThis Social Bookmark Button

Sunday, November 05, 2006

Zucchini Slice


I finally got this recipe right!

Ingredients

Olive Oil
2 Zucchinis
150g Mozarella Cheese
1 Onion
300g Streaky Bacon
3 Eggs
2 Large Tomatoes
1 cup (150g) Self Raising Flour

What to do

1. Preheat oven to 180 degrees.

2. Get hold a large and fairly deep baking dish. Brush the sides and base with olive oil.

3. Grate the zucchini and mozarella. Place in a large bowl.

4. Chop the onion and bacon as finely as possible. Place both in the bowl with the zucchini and mozarella.

5. Add the flour to the bowl.

6. Whisk the eggs then add to the bowl. Add the eggs to the mixture then season with salt and pepper. Go easy on the salt because the bacon already makes it quite salty.

7. Mix everything together. It's a bit of a pain at this point in time because of the flour but don't give up. If you get a bit pissy (i.e. me), use your hands. It always works. Your mixture should look like this:


8. Spoon the mixture into the prepared dish.

9. Chop up the tomatoes then lay the sliced tomatoes on top of the mixture. Drizzle some olive oil over the top.

10. Place the mixture in the oven and bake for 25-30 minutes until the top is evenly brown.

Top Tips:

Never, NEVER compromise on the bacon. Streaky bacon (bacon with streaks of fat) is the way to go because it will make your zucchini slice really tasty. But if you're still waist-conscious, just put in 150g of streaky bacon.

Enjoy and don't share with your friends if you love it too much.


Tags:

AddThis Social Bookmark Button

Thursday, November 02, 2006

Mochi

Mochi....squishy, adorable tiny lumps of sweet gooey goodness!My first encounter with mochi was at a Japanese supermarket in Malaysia where candy and all sorts of snacks were sold. Being young and curious about all things "cute" I purchased a tray of 6 pretty pink mochi. I couldn't read the Japanese labels and didn't have a clue what they were filled with or even if they were sweet or savory. I didn't really care;...they were soft, round and cute; I was sold! *laughs*
I dusted the tasteless excess flour off the surface and took a satisfying bite right thru the center. Red bean paste!!! It's been my favorite mochi filling since.

Mochi is the Japanese variant of Chinese rice cake, which, like its Chinese origin, is made of glutinous rice, pounded into paste and molded into shape; however, unlike the Chinese variety, it is molded right after it is pounded, whereas the Chinese variety is baked once again after to solidify the mixture as well as sanitize it. Traditionally in Japan, it is made in a ceremony called mochitsuki. It may also be made in an automatic mochi machine, similar to a breadmaker. In fact, mochi can be made using a breadmaker if the rice is soaked and steamed separately and the machine can be started in a kneading mode. In Korea, a nearly identical food is called chapssaltteok . chapssal meaning "sticky rice," and is also spelled tteok, duk, dduk, duek, or d'uk. (wikipedia)
I had my first attempt at homemade mochi today....it doesn't take more than 10 minutes to make...but forming 6 perfect little round mounds could possibly take more than 30 painful minutes. Fellow Malaysian chefs who find "onde-onde" difficult to make...I suggest you get your mochi from the asian grocer. Haha. It's STICKY...and difficult...I personally feel im alright with handling all sorts of dough, cookie doughs, soft pastes, dumpling making, pastry dough kneading and the like, but making mochi is a different category all together. I wasn't exaggerating with the word sticky in bold....even with fingers, work surface, spoons and palms dusted with tapioca flour, I had difficulties keeping everything neat, pretty and ROUND! Out of frustration, I whipped out my mini muffin pan, dusted it with flour and pushed hot filled mochi's into tiny holes *proud grin* I love how resourceful I am *wink*
1 cup glutinous rice flour
1 cup water
1/4 cup castor sugar
food colouring (if you like)
Pre/home made red bean paste cooked in syrup(store in refrigerator to make it easier to roll)
Beat all ingredients in a bowl with a balloon whisk till free of lumps. The mixture should be runny and pale. Pour mixture into a silicone loaf mold and cover with clingfilm. Cook in Microwave on high for 3 1/2 minutes. Remove and tear off cling wrap. Leave to cool for 1-2 minutes before handling. Dust hands GENEROUSLY with potato flour/tapioca flour before handling hot mochi. Make round balls of ready made red bean paste and set aside to make wrapping and filling more convenient.
Dust rolled and filled mochi's with a light dusting of flour before storing. I placed mine onto pretty paper doilys and made tiny parcels of mochi with some ribbon.Tip: use a clean and dry paint brush to dust off excess flour from surface to neaten.

Tags:

AddThis Social Bookmark Button

Saturday, October 21, 2006

Festival of lights...Diwali

Happy Diwali to Indians worldwide~ and Malaysian's like me finding every excuse to have a festive celebration!

Diwali, also called Deepavali (Hindi: Diwali or Deepavali, Marathi: Tamil: Kannada: Deepavali) is a major Hindu festival. Known as the "Festival of Lights," it symbolises the victory of good over evil, and lamps are lit as a sign of celebration and hope for mankind. The festival of Diwali or Deepawali (literal meaning: lines of lamps) is rooted in the mythological epic Ramayana, and is a celebration of the return of Lord Ram after killing Ravan the Demon during his exile for 14 years. The day of killing Ravan is celebrated as Dussehra (19 to 21 days before Diwali). Celebrations focus on lights and lamps, particularly traditional diyas. Fireworks are associated with the festival in many regions of India.

Diwali is celebrated for five consecutive days in the Hindu month of Ashwayuja. It usually occurs in October/November, and is one of the most popular and eagerly awaited festivals of India. Hindus, Jains and Sikhs alike regard it as a celebration of life and use the occasion to strengthen family and social relationships. (wikipedia)
When the Malays celebrated "Hari Raya"; my chinese family would have a celebration of our kind; charcoal on the barbecue pit, Mah-Jong sets, wine, cards, Karaoke, and the sort! *laughs* I love being Malaysian...and I love my family's take on life and festivity.
Still in tune with my habits from home; I had a little Diwali celebration in my Sydney kitchen.
Milk and Coconut Burfi
1 cup fine grated fresh coconut
1 L milk
3/4 cup sugar
3 tbsp condensed milk
3-4 tbsp ghee (I omitted)
5 cardamom pods
Chopped almonds as garnish
Heat milk and cardamom in a large pot, take it off the stove and cover with lid for 30 minutes. SPoon out the pods. Return pot to stove and add the rest of the ingredients (leave out the almonds). Stir mixture over low heat for about 1-2 hours till mixture turns thick and sticky. Be careful to watch for the milk burning. Try using a pot with a thick base and stirring continuously. When lumpy and sticky, add in the ghee and cook for another 30 minutes. Dish out onto a greased mold/tray or layer with clingfilm (like I have done with mine). Top with almonds and allow to set overnight. Slice to serve.This recipe reminds me of a creamier and softer version of coconut candy I used make in Malaysia.
burfi is an Indian /Pakistani sweet made from condensed milk, cooked until it solidifies. Barfi is often flavoured with cashew, mango, pistachio and spices, and is sometimes served coated with a thin layer of actual silver. Visually, barfi sometimes resembles cheese, and may have a hint of cheese to it. For this reason, barfi is sometimes called "Indian cheese cake". Barfi is popular all over India and is often a part of Indian festivals (wikipedia)
Indian sweets are commonly eaten in small portions as they are meant to be very sweet and intensely rich. These gave me an immediate sugar rush with one mouthful! Haha; I still remember my first taste of Gulab Jamun...it was probably the sweetest thing I've eaten to date! *laughs*
Im visiting an Indian home for dinner to celebrate! *gets excited* Thanks heaps to Pinky's family for inviting Amrit and I over!

Tags:

AddThis Social Bookmark Button

Thursday, October 19, 2006

gyutan don


awhile ago , i was a regular patron of a cozy japanese place until i became loyal to this particular item on the menu . the only catch was that , for the longest time , i never bothered to figure out what it was exactly .

it's understood that many will be uncomfortable even with the thought of using the main ingredient .

why ?

gyutan is japanese for ox tongue .

i can already sense the squirms...but hey , at a mere flat market rate of 3 bucks per giganormous piece , it's will save you loads of money when it comes to meals , expecially with such a simple recipe . at this price , you'd be wondering how much those korean barbeque places earn . peculiarly , i've encountered gyutan don only in the japanese place i mentioned .

just a few notes before you attempt this ( if you actually want to ) . when working with ox tongue , understand that you need to wash it very thoroughly with cold water and then wash it even more thoroughly again and again . get the point ? haha...why the cold water ? it's extremely difficult to manouver around and slice when it's not stiff and almost impossible without a sharp knife . also , make sure you skin it and only use the meat . one final thing , don't chop it into chunks like me...really...only use very thin slices .

there are absolutely no recipes for this online , so i had to come up with one myself...a not so japanese but simple one .

what you need ar?

1/2 ox tongue , sliced very thin
1/3 cup mirin
1/3 cup dark soy sauce
1 tablespoon oil
spring onion , chopped
small red chillis (a.k.a. cili padi) , chopped

how liao ?

see how short the ingredient list is ? simply marinade the well-washed tongue slices in mirin and dark soy sauce for an hour or two . grill on an oiled pan until cooked ( which would take only a couple of minutes if you use slices hor ) . towards the end , season with a touch of mirin and off the fire . just before serving , briskly toss it in the spring onion and chillis to give them that extra oomph . it's that simple lor .


Tags:

AddThis Social Bookmark Button

Tuesday, October 17, 2006

Kaya

I spent 3 1/2 hours reading my management notes, preparing dinner and dancing away to music as I stood stirring this precious pot all afternoon.
What's so precious? you ask...
It's Kaya. The word "Kaya" means "rich" in the Malay language, and RICH is definitely a good word to represent its yummy sweet gooey-ness ! In culinary terms, Kaya would be described as a Malay spread of Egg curd/jam.
In Malaysian-student-studying-abroad terms, Kaya= MmmMmmmmm!*YUM!!*

I'm usually all for fast and easy recipes; the type of person who would try cooking/defrosting/baking almost everything in the microwave to see if it works quicker that way! *laughs* I'm still bewildered by how I refused to work that same way this morning. I browsed and took apart 8 or more Kaya recipes online and from books. I tweaked my proportions a little according to reviews and Kaya-making tips available to reduce the sugar and cholesterol levels without destroying the recipes completely.

1 1/2 cup sugar
1 1/3 coconut milk - try to get freshly squeezed milk (canned worked fine for me too *shrug*)
5 eggs (XL size)- use very FRESH eggs

Beat eggs and sugar till well blended. Cook in a slow cooker over low heat. When slightly thickened, pour in coconut milk in a thin stream. Stir well until liquid mixture is thick and gooey. The color should have changed from yellow to a darker shade in 1-2 hours of constant stirring. Look for a recipe you can do in the microwave if you're feeling lazy. Google is gold. *wink*

*sigh* My end product was SOoo VERY satisfying....stirring Kaya in my slowcooker continuously for hours was frustrating but there wasn't any other way to achieve deliciously smooth, silky Kaya!I decided to share my Kaya with several Malaysian friends who lived nearby to try making it worth my trouble. I would eat my Kaya on a slice of toast for breakfast in the morning; but I wouldn't touch Kaya out of jars available at Asian supermarkets...
After having a go at making my own; and shivering at the cup loads of sugar....I wonder what goes into manufactured Kaya which tastes a WHOLE lot sweeter and is BROWN....mine is yellow...cup and cups of sugar caramelizing was done to achieve its dark rich color. *shudder*
I made several strips of butter-y puff pastry as a delicious accompaniment to our freshly made Kaya. Dessert was simply divine!...*sigh* heavenly....*licks lips*

Tags:

AddThis Social Bookmark Button

Thursday, October 12, 2006

chilli con carne !


i shamelessly admit that this is similar to noel's chilli , with a few exceptions of course...i maintain mine is a mexican version (haha) and it's capable of standing as a dish alone...but still simple. furthermore, with the heat wave now, i was too lazy to obtain the fresh tomatoes.

what you need ar?

500 g minced beef (doesn't matter whether it's premium or lean)
1 whole white onion, chopped ( i tend to shape them as rings, but diced also can lar)
4 cloves garlic, crushed
1 whole red chilli (note that they're actually called capsicums here) , cored , seeded and diced
5 small red chillis (erm...a.k.a cili padi...the thin ones...not capsicums) , chopped...of course , to be truly mexican , you'd add jalapenos here...but i can't seem to find any .
1 standard 400 g chopped/diced tomatoes
1 standard 400g red kidney beans, drained
1 cup beef stock/water mixture
5 teaspoons ground cumin seed
3 teaspoons chilli powder
1 teaspoon ground coriander

how liao?

in your pot , sautee the onion and garlic on a low fire until soft . then , chuck in the minced beef and cook the mince until it loses its reddish pink colour....make sure to break the meat up hor ( a fork will execute this just fine ) . add in the can of tomatoes (with the juice hor) , the diced capsicum and the chopped small chilllies . stir and simmer for 10-15 minutes ( let the meat absorb the main flavour hor ) . next , add in the beef stock/water mix and season with the ground cumin, chilli power and ground coriander . cover the pot and simmer over gentle heat for 45-60 minutes ( depending on your desired consistency lor ) . finally , add the drained red kidney beans and cook for another 10-15 minutes . tenga...fruir la aji .

warning : please never underestimate the spiciness of this recipe under any circumstances .

notes: you may wish to season with some fresh ground black pepper as well but i don't think it makes much of a difference and for those of you who are willing to be adventurous , add a couple of blocks of dark chocolate too (make sure it's >70% cocoa hor)...and you'll have dark chocolate chilli con carne .

extra note : i realise that the amount cannot be finished within a single siting ( unless you share) but that was done on purpose...because chilli tastes better a day old...or more :)

Tags:

AddThis Social Bookmark Button

Monday, October 09, 2006

Spicy Tuna Rice Paper rolls

I was in a hurry to dash out for a couple of errands this afternoon and didn't have much time to map out lunch for us at home. I opted for a 'no-cook' meal of quick healthy rice paper roll ups for my 'babies' before running off. I call them my babies because I love them to PIECES and I'm the self-proclaimed 'mommy' of the house.*laughs* Rice paper rolls are so quick to make; and they didn't take me much effort at all....*sigh* an ingenious culinary discovery by the Vietnamese!
I dug around the pantry and refrigerator for loose bits of vegetables and came up with a delicious "tuna-combo" which had our taste buds tingling with satisfaction.

Makes 8:
8-9 Rice paper sheets
2 cans of spicy tuna
1/4 iceberg lettuce leaves shredded
1/2 cucumber sliced into thin strips
1 carrot grated
1 red chilly sliced
2 stalks fresh mint leaves (roughly diced)
fried crispy shallots ( available at asian supermarkets)
Sauce: 1 tbsp sweet chili sauce+2 tbsp light soy sauce+ 1 tsp fish sauce + 1/2 red chilly sliced+ 1 inch cube ginger sliced thinly+ 1 garlic clove crushed and roughly chopped+ 1 tsp sugar

Stir sauce ingredients in a small container till well incorporated and set aside.
Soak 1 sheet of paper in a shallow bowl filled with water for approximately 30 seconds. Gently remove and lay on a flat work space. Arrange filling ingredients in the center horizontally, sprinkle mint leaves+ fried shallots and fold the left and right corners in by 1-2 inches. Gently roll up the rice paper roll into a long cyclindrical shape. Repeat with the rest of the rolls. Serve with spicy chilly+ ginger sauce!
The rolls may turn out a little messy in the beginning but keep in mind that practice makes perfect. Try not to soak the paper for too long or it may tear too easily. Throw out the torn ones...start over with a new sheet...unless you want to end up with rice paper rolls leaking like a worn-out faucet.

Tags:

AddThis Social Bookmark Button

Sunday, October 08, 2006

Party Food: Easy (iest) Carbonara

Before I start, let me first apologise for the crappy photos that you will encounter.

The digital camera moved out the day my sister did. So there. I'm left with my 1.3 megapixel phone camera.

...

I believe my calling in life was to create the easiest, fastest and never-will-fail recipes.

I'm no gourmet chef and I have since given up on trying to be a Domestic Goddess but I still need to eat, right?

Over the weekend I got invited to a friend's party and groaned inwardly when he told me to bring a dish.

I knew everyone would be bringing a salad or dessert so I thought I'll be nice and do a mains.

This is the easiest and best of all, guranteed to never fail recipe of a carbonara (a cream-based pasta sauce).

If you do fail, then there's something obviously wrong with you... :)

*note that this recipe is measured to feed a troop of starving males. So measure accordingly.

* I detest gardening so all my herbs came from bottles.

What you need:

750g Spiral Pasta

300ml Lite Cream (4 bottles)
300g (or less) Bacon Pieces
Plenty of Mushrooms
2 cloves of Garlic
Chilli Flakes

Parsley
Mixed Herbs
Salt
Ground Pepper

Putting it together:

1. Boil the pasta.

2. While the pasta is boiling, chop up the garlic, mushrooms and bacon (unless you're me and got bacon pieces from the deli).


3. Fry up the mushrooms. When the mushrooms are nearly done (turning a darker colour and softening), throw in as much (or little) chilli
flakes as you want and add some mixed herbs. Set aside the mushrooms.

4. Fry up the bacon quickly. Set aside on some paper towels.


5. Clean up your frying pan or wok. The pasta should be done by now so drain the water and place it in a container and allow to cool.


6. Pour in the first 600ml of Lite cream. Allow the cream to heat up for awhile on a moderate fire then add in the equivalent to 1 clove of garlic.


7. Add in half the bacon and half of the mushrooms. Stir for awhile then leave to simmer. Add in ground pepper, salt to taste, parsley and any other spices if you think you need a bit more omph.

8. Leave to simmer until it starts bubbling happily.

9. Once the sauce is happy, remove from heat and pour it into a container.


10. Repeat process with the remaining cream, mushrooms and bacon.

DONE!

* Remember to keep the sauce and pasta separate
*Always, always allow the sauce to simmer then bubble up
* 300 ml of cream is enough sauce for 2 people.

Verdict: It was enough to fill up the hungry males and one male in particular had at least 4 helpings.

Tags:

AddThis Social Bookmark Button