Google
Showing posts with label Chicken. Show all posts

Friday, August 07, 2009

Hainanese chicken chop rice

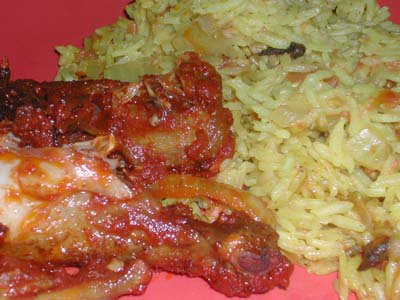
ok, purists can stop yelling at me about how it's supposed to be Hainanese PORK chop rice. I just happened to have chicken in the fridge, ok? just substitute the chicken for pork chops lah! A couple of weeks ago I have some great Hainanese Pork Chop rice at this restaurant in Georgetown. It cost me RM12, along with a three-hour journey from my home outside USM to Georgetown. So, I decided to make my own, which cost me half price, although it still takes an hour to prepare because there's so many stages to cook. But worth it.


Hainanese Chicken/Pork Chop Rice
1 chicken cutlet (I used store-bought... what?! they're convenient!)
1 potato, cut in rounds
1 onion, sliced
3 tbsp frozen peas
optional) 1 broccoli stem, cubed

1/4 cup water or unsalted stock
2 tsp cornstarch
1 tsp vinegar
1 tbsp dark soy
5 tbsp ketchup
pepper to taste
(optional) hot sauce to taste

1. Steam peas and broccoli (if using). Set aside.
2. Shallow-fry potatoes, onions and chicken. Drain and set aside.
3. In a hot wok, mix in the rest of the ingredients together. Add chicken/pork and veggies, and simmer sauce to reduce by half. Serve immediately, with rice.

Breakdown:
Total Cost: RM6
Chicken chop: RM 3.50
Potato: RM0.70
Onion: RM 0.30
the rest were lying around in the pantry....

AddThis Social Bookmark Button

Thursday, September 25, 2008

Pan Fried Chicken

Fried chicken. Now, who doesn't like it? This recipe is based on Alton Brown's but if you look closely there are a few modifications because of the inavailability of some ingredients. The upside is that this recipe is pan-fried and uses much less oil.


Pan Fried Chicken
Chicken pieces - I used wings

Seasoning
1 tsp salt, chili powder, coriander per piece

Full cream milk
Flour for dredging
Oil for frying

Special equipment
2 plastic containers big enough to hold twice the volume of chicken.
Heavy wok or pan

1. Separate chicken wings and place in plastic container. Pour milk to half cover and leave to marinade for at least four hours. Turn chicken pieces every two hours to ensure good absorption.

2. Drain milk and lay chicken out on board. Sprinkle liberally on both sides with seasoning and then dredge with flour, taking care to shake off excess. (What I do: Put flour and chicken in container, seal tightly and shake vigourously)

3. Fill pan with oil up to 1 cm. Heat to 200 (Medium) and place chicken pieces skin side down, taking care to leave space between the pieces. Fry each side for exactly 5 min (adjust for bigger pieces of chicken), turning only once.

4. Drain and serve! This chicken goes really well with barbecue sauce.

Cost breakdown
Total cost: RM3.50
Chicken wings RM2
Milk RM1
Flour RM0.50

Tags:

AddThis Social Bookmark Button

Saturday, August 02, 2008

Chicken & Mushroom Pasta Bake


First and foremost, I must apologise for the appalling nature of my photographs. I've don't have a digital camera so I rely on my 2 megapixel phone camera to do the honours!

Anyway, this dish is something I baked up out of curiousity and it turned out to be a fantastic winter-warmer. Lasts a good few days too!

The trick to this recipe is to use plenty of mushrooms. Also, make sure you use whipping cream as it takes away some of the richness of the dish.

Chicken & Mushroom Pasta Bake

3 to 4 chicken thigh fillets (diced)
1 1/2 to 2 cloves garlic (chopped and diced)
350g button mushrooms (sliced)
500g short pasta (penne, macaroni)
300 ml whipping cream
200g (or more) parmesan cheese (grated)
1 cup white wine
Parsley

1. Preheat oven to 200 degrees. Cook pasta until al dante.

2. While pasta is cooking, season diced chicken with salt and pepper. Set aside.

3. Heat some oil in a pan. Fry up garlic until fragrant but not brown, then add in chicken. Stir fry until brown.

4. Add in mushrooms and white wine. Simmer over low fire for 2 mins.

5. Add in cream and bring to boil. Season with salt and pepper to taste then remove from fire and set aside.

6. Pour in cooked pasta into the mixture and mix well. Add in some parsley and 200g parmesan cheese. Mix well.

7. Transfer the mixture to a baking dish. Sprinkle with extra parmesan cheese on top and bake until golden brown.

Voila!

AddThis Social Bookmark Button

Monday, July 28, 2008

Fragrant Garlic & Chicken Rice

Another favorite from home!


Fragrant Garlic & Chicken Rice

(Makes 3 cups of rice)

2 cloves garlic chopped finely
3 lap cheong (Chinese sausage) sliced
3 cups cooked rice
8 or more chicken wings (chopped into smaller pieces if you like)
Minced ginger
Dark soy sauce
Oyster sauce
Salt

1. Marinade chicken wings in soy sauce and peppper.

2. Fry garlic until golden brown. Set aside.

3. Fry lap cheong, add a teaspoon of minced ginger then set aside.

4. Remove chicken wings from marinade and fry until brown. Make sure you fry the wings on a medium to low fire to avoid burning the wings. Add some dark sauce for colour and a dash of oyster sauce.

5. When chicken is cooked and fragrant, add cooked rice to the chicken. Pour in garlic and lap cheong and mix well until fragrant. The trick to this dish is to flatten the rice, allow it to burn a bit, stir, then flatten again. It'll make your rice crispy.

6. Season to taste with soy sauce. Voila!

AddThis Social Bookmark Button

Sunday, July 27, 2008

Nasi Paprik

Here in the northern part of Malaysia, where I'm closer to the Thai border one begins to see a closer melding of culinary influences between these two countries. Nasi Paprik (or Phadprik or phad prik or without the 'h') as it is sometimes spelled is typical of this kind of culinary hybrid Consisting of chicken or beef stir-fried with vegetables in a savoury and slightly-sweet sauce. I'm not sure where the name comes from: nasi is Malay for rice and I'd always thought paprik referred to the green or red peppers in the dish. Phadprik sounds more Thai, of course, and there is a side dish called pad prik, which is a beef and veggie stir fry. So that sounds about right, no?

When I was first introduced to this dish (ironically, in Singapore) it was the beef version, but chicken and tofu are both worthy substitutes. In any case, the dish is suprisingly simple prepare. For veggies, the lemongrass and capsicum are NOT optional, ie they're mandatory. The rest is up to you, though I'd recommend using at least three different greens for colour and flavour.


Nasi Paprik, aka Nasi Phad Prik or Nasi Phadprik (4 serves)

2 chicken breasts, sliced thin in 1-inch chunks
Vegetation - cut in 1 inch chunks
One stalk of lemongrass, white parts only
One capsicum
(other veggies optional, use at least 3. I used these:)
2 cloves garlic, whole
Small onion
Baby corn
Broccoli
Large red chillis
Carrot
(these are also great)
Cauliflower
Cabbage
Lime leaves

Sauce
2 tbsp oyster sauce
2 tbsp kicap manis (Sweet black sauce)
Sugar
Pepper
Water or stock
Oil

1. Heat 2 tbsp oil in the wok in medium low heat and toss garlic for a couple of minutes to absorb flavour

2. Remove garlic, turn up heat to high and brown chicken until not visibly raw. Remove from wok and set aside.

3. Replenish oil if necessary and add vegetables, starting with the harder ones (Like carrots) and ending with onions. Reintroduce the chicken and stir well.

4. Reduce heat to medium-low and make space for sauce. Start with oyster sauce, kichap manis, 3 tbsp water/stock and 2 tsp sugar. Combine thoroughly before integrating with rest of the meat and veggies.

5. Add sugar and pepper to taste; serve with white rice.

Tags:

AddThis Social Bookmark Button

Thursday, January 31, 2008

Today's Lunchbox: Morocan Chicken Stew

I modified this stew recipe from the traditional Moroccan tagine - the only difference is, I didn't use beans because I didn't like them much. It's great with bread or rice, but even better with couscous.


Moroccan Chicken Stew
(Makes 3 servings)
2 chicken breasts, cut into chunks
1 onion, thinly sliced
1 carrot, cut in chunks
1 red pepper, cut in 1-inch chunks
1 can peeled tomatoes
Equal portion of chicken or vegetable stock
1 tbsp cumin
1 tbsp coriander
1 cinnamon stick
Juice of one lemon
Olive oil
Salt

1. Heat oven to 150. Coat onion slices with a pinch of salt and then coat with 1 tsp of olive oil. Place in a baking pan and roast for 30 min. Stir every 10 min
2. Coat pepper and carrot chunks with another tsp of oil and then join with the onions after they are done. Re-roast for another 20 min.
3. Once all the vegerables are roasted, Heat 1 tbsp of oil in a stewing pot and lightly brown the chicken
4. Add all the roasted veges, along with the spices, canned tomatoes, lemon juice and stock. Let it come to a boil, cover and simmer for Half an hour.
4. Serve over rice or couscous! (Hint: Drain some of the hot liquid for use in the couscous!)

Cost per serving: $2.20
Breakdown:
Chicken breasts: $4
Vegetables (onion, carrot, pepper): $2
Lemon: 50c

Tags: , , ,

AddThis Social Bookmark Button

Tuesday, October 30, 2007

One-pot Briyani


I know I've blogged about Briyani before, but it never hurts to revisit an oldie-but-goodie. This isn't a cheaters, budget version, but something a little more authentic to the Dum Briyani, which means the meat and rice are cooked together in the same pot. Besides the usual range of spices, you'll also need a slice of papaya for the marinade. I read somewhere that the compounds in papaya serves as a natural meat tenderiser and so would be great for tough meats like mutton and beef as well. Notice there's no tumeric in this recipe too - the nice brown colour is caused by the brown onions.

Ingredients
4 large onions, thinly sliced
3 chicken drumsticks
1 cup of long-grained rice (basmati recommended)
1 slice of papaya, mashed
2 red chillis, chopped
1 stick of cinnamom
1 tsp cloves
1 tsp coriander
1 tsp cumin
1 tsp fennel

1. Marinade the chicken with the mixture of papaya and chilli for at least an hour
2. Brown the onions in a pot with a little salt, until soft. Remove most of the onions but reserve a layer to coat the bottom of the pot.
3. Pour a third of the uncooked rice over the onions, followed by the marinaded chicken, another layer of rice, and then alternate rice and onions.
4. Pour one and 3/4 cups of water, ensuring all the rice grains are submerged underwater.
5. Cover and cook in low heat for 20 min or until the rice is cooked. Serves 3.

Cost Per Serving: $2.30
Breakdown:
Chicken: $3 for three pieces
Spices: $0.50 (averaged)
Rice: $1 for a cup (basmati)
Papaya: $0.70
Onions: $1.50

AddThis Social Bookmark Button

Tuesday, June 05, 2007

The Chicken that exploded my nose

I've been experimenting with wasabi powder of late, especially since I discovered wasabi peanuts as a snack. So for may packed lunch this week I decided to experiment a little bit more with all the hot stuff in the kitchen to create the Chicken That Exploded My Nose.


The Chicken That Exploded My Nose
Ingredients
Chicken breasts, cut in strips
2 tbsp Dijon mustard
1 tsp wasabi powder
1 tsp chilli powder
Breadcrumbs

1. Create a marinade using the mustard, wasabi and chilli powder to marinade the chicken with. Leave in fridge for a couple of hours.
2. Coat strips with breadcrumbs and deep fry until golden brown.
3. ALTERNATIVELY, coat breadcrumbs, spray with oil and bake for 20 min.

The picture you see is the fried version. Unfortunately, it didn't explode my nose as expected and was VERY much less spicier than I intended it to be. So I decided to make a dipping sauce to go with it.

The Dipping Sauce for the Chicken That Exploded My Nose
2 tbsp dijon mustard
2 tsp honey
1 tsp wasabi powder

1. Mix everything together. Use as condiment for the chicken and poultry.

Tags:

AddThis Social Bookmark Button

Wednesday, May 23, 2007

Chicken Tikka


This is my version of the Indian tandoori dish, from scratch. Obviously, I don't have a large clay oven hanging at home, so one uses the conventional oven to bake and then broil this dish. Also, I used breast meat which is dryer, but makes it easier to cut into huge chunks. My favourite tandoor usually uses rolled up chicken thighs that are more juicier.

Noel's Chicken Tikka

Marinade:
1 small package of yoghurt
1 tsp cumin, ground
1 tsp coriander, ground
3 tsp tumeric, ground
5 tsp chilli powder (or to your taste)
1 tsp black pepper, ground
1 tbsp sugar
juice of one lemon
1 one-inch piece of ginger, grated with juices

Chicken pieces, cut in 2" chunks
Aluminum Foil

1. Mix all the ingredients of the marinade together, reserve 1/3 for later. Marinade chicken in remaining 2/3 portion, in the fridge for at least 2 hours.
2. Preheat oven to 180 degrees. Make a foil pouch and bake tikka in oven for 15 min.
3. Set oven to grill at 200 degrees. Remove pouch cover (we're going to put it back to the oven). Dip baked chicken in reserved marinade and grill on each side for 5 min. Serve with rice and curry! =D

Tags:

AddThis Social Bookmark Button

Sunday, May 20, 2007

Kimchi Fried Rice

Kimchi is a pickled vegetable salad unique to and ubiquitous in Korea. The stuff is obviously salty, and generally spicy and usually served cold. A bottle of kimchi can be a little pricey, but it goes a long way because it can last a while in the fridge. It makes a great addition to the fridge as instant food, because it can be eaten with just about anything. Late night snack? Enliven your instant noodles with a side of kimchi! =D

I was walking through a food court yesterday when I saw a menu offering kimchi fried rice. Having some kimchi stored in my fridge, here's my version of the dish. You can use any meat you like, although I imagine the white meats go better with this dish than the red ones. And char siew (Chinese barbecued roast pork) might also not go well with the dish as the sweetness of the char siew will interfere with the kimchi.


Noel's Kimchi Fried Rice
(serves 2-3)

2 cups of cooked rice
2 eggs, lightly beaten
1 tomato, chopped
1 spring onion, chopped
Cooked meat: for this dish I had sliced chicken breast and roast pork.
2 servings of kimchi - bear in mind that it should be 1/3 a regular serve of vegetables because of the salt.
1 tbsp of kimchi "juice" (the liquid that is left from the kimchi)

1. Fry egg on wok. Bunch on side of wok while adding rice to heat.
2. Mix cooked scrambled egg with heated rice, add spring onions and tomatoes, followed by meat.
3. Turn off heat. Add kimchi and kimchi juice last, stir in warm wok (without the fire on). Serve.

Tags:

AddThis Social Bookmark Button

Friday, October 06, 2006

Satay Beef Skewer

Easiest dish ever.

Ingredients:
+ 250 g of diced beef/chicken/pork/lamb
+ 4 bamboo skewers
+ satay sauce
+ honey (optional)

Steps:
1. marinate meat with 1 tbsp satay sauce
2. stick the meat on the skewer
3. baked it for 15-20 minutes at 210 degree
4. add honey to finish (optional)
5. serve with satay sauce (optional)

Ta-da!

Satay Beef Skewers*

Tags:

AddThis Social Bookmark Button

Wednesday, October 04, 2006

Abalone Tofu & Minced Chicken Dish

It has been awhile since my last post. Took a short trip to Grampians during the spring break.
My fave pic from the trip! You guys should go visit the place if you have the chance to =)

Photobucket - Video and Image Hosting


Anyways, back to the food! There are actually two methods of cooking this dish and it's up to you to choose how you want to do it.

Photobucket - Video and Image Hosting


To serve 3-4, you need:
a. 350g-400g minced chicken
b. 2 tubes of egg tofu-sliced
c. Abalone Sauce (i use New Moon's but am sure any other brand is also acceptable)

Marinate the minced chicken with:
a. 1 tbsp sesame oil
b. 1/2 tbsp light soy sauce
c. a dash of pepper

Steaming Method:
Remember to prepare the steamer before hand. Then in a bowl, place the marinated minced chicken first followed by the sliced egg tofu on top of it. Pour abalone sauce generously over the ingredients and proceed to steam it for 20-25 minutes.

Note: Use a bowl because there will be some gravy when it's done. =)

Stir-fry Method:
Heat the wok and fry the marinated minced chicken till it is half-cooked. Add the sliced egg tofu and pour abalone sauce generously over ingredients. Then add 2-3 tbsp of water (depending on how much gravy you want) and let everything simmer for about 15 minutes.

Variation: Add some shiitake mushrooms if you like! Also, try replacing Abalone Sauce with Oyster Sauce for a different flavour.

All you need is a bowl of steaming hot rice and your lunch/dinner is settled! Enjoy. =)


Tags:

AddThis Social Bookmark Button

Thursday, August 03, 2006

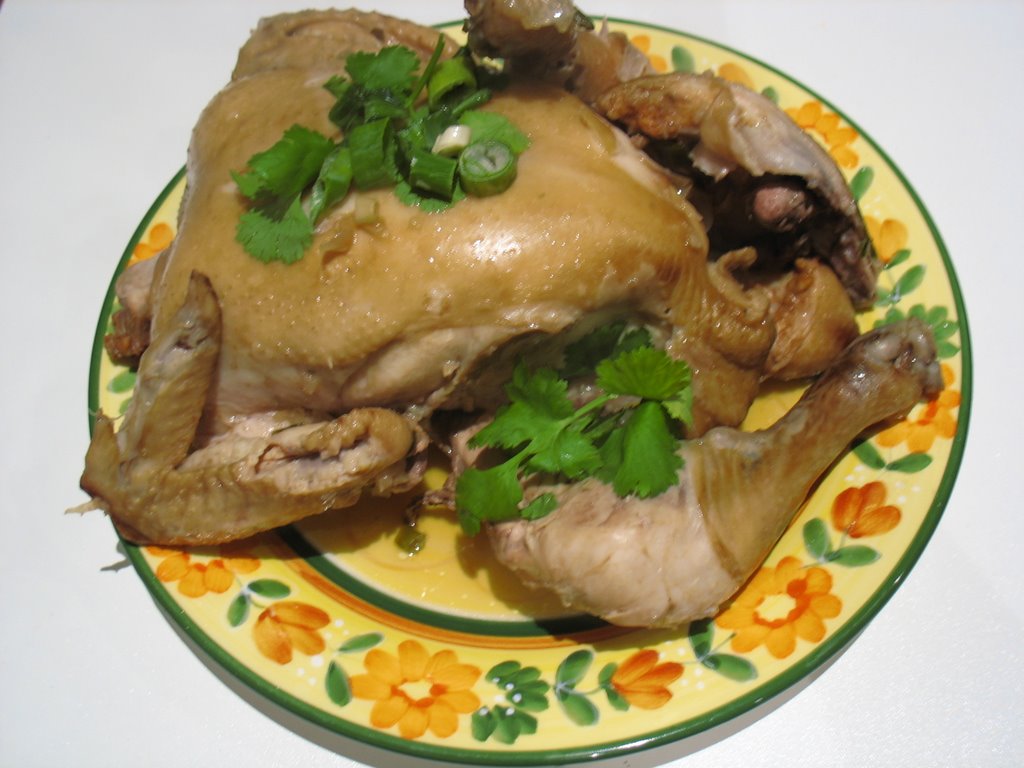
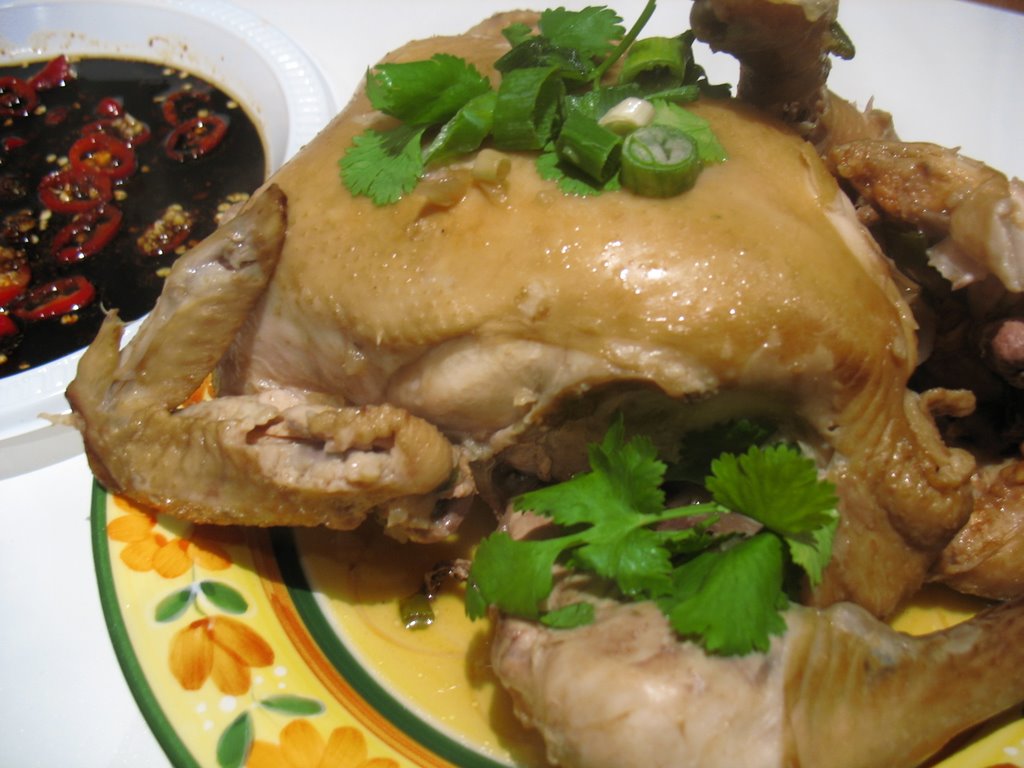
spiced steeped chicken

steeped chicken is originally a style of cooking chicken whereby we infuse it with light flavours and serving it with contrasting pungent sauce to accentuate the flavours . somewhat inspired , i took a daring plunge and modified it to my own style . so here goes...spiced steeped chicken :

what you need ar ?

1 whole fresh chicken ( mine was about 1.8 kg) .
6 cloves of garlic , crushed but not chopped ar .
4 spring onions , chopped .
6-8 heaped tablespoons of chicken stock powder .
3 teaspoons of light soy sauce .

seems normal so far leh ? here are my own twists :

1 stalk lemongrass (don't do anything to it) .
3 thumb size chunks of ginger .
3 red chillis , incompletely perforated on both sides (i.e. three one inch cuts along each side) :


(allows extraction of chilli flavours without the interference of the seeds) .
1 star anise .
8 cloves .
11 kafir lime leaves .
a handful of chopped coriander .
3 tablespoons of ground white pepper .

how liao ?

before you do anything , make sure the chicken is clean hor . for extra measure , pour some red vinegar generously into the chicken . this contributes to flavour and also acts as a disinfectant .

then , make sure you have a pot big enough for it , chuck the chicken inside and fill it with just enough water to immerse the chicken in . i didn't have a big pot so i improvised using one of my deep pans , and covering the exposed parts with another pan to capture the steam ensuring it was cooked in time . anyhow , just put all the above mentioned ingredients into the pot with the chicken , bring it to a boil and let the mix simmer for a nice hour . by then , your broth will contain yummy rendered fat and your chicken will be so soft , you don't even need a knife to pick off the bones . of coure , needless to say , unless you want to be selfish , don't eat this alone hor...can finish one chicken alone meh ?


serve with rice . the broth is surprisingly yummy (if you pretend the degraded ingredients were invisible ar) . if you want an individual sauce to accompany this , just mix some chilli (preferably the small red cili padis hor) , minced garlic , 1/2 light soy sauce , 1/2 dark soy sauce , and a generous amount of sesame oil (peanut oil also can) lor .


Tags:

AddThis Social Bookmark Button

Sunday, July 30, 2006

yakitori


And now, the first recipe using the white meatballs! Yakitori is a Japanese kebab, a kind of informal snack that one goes to enjoy after a long day's work. You can also use other types of meat, although I'm quite partial to the chicken meatball version you see here. And yes, ideally a *real* yakitori should be skewered and cooked over hot coals, but we're on a budget, yes?

Yakitori
White meatballs
1 tbsp sugar
4 tbsp dark soy
4 tbsp light soy
6 tbsp mirin, or chinese rice wine

1. Create the sauce dip by mixing everything (except the meatballs) together and heat in a pan until sugar is melted. Pour into a bowl.

2. Using a little oil, brown desired amount of meatballs.

3. Once browned, dip each meatball into sauce dip and continue frying. Take care to keep the meatballs rolling because the sauce browns easily. Repeat the process as many times as you like.

Oh well, if you really want the atmosphere, you can skewer them and serve...

Tags:

AddThis Social Bookmark Button

White meatballs

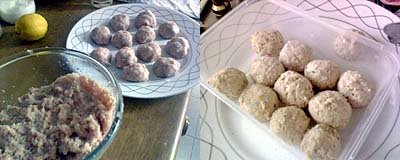
Ok, before you think this post is something vulgar - it's meatballs made with white meat. As in chicken and pork. (Shame on you and you should go wash your brain with soap!) Now that we've got that out of the way...


This is what I'd like to call a Base recipe - it forms the base of other recipes that i'll whip up for my packed lunches throughout the week (more on that later). Of course, the meatballs are good enough to eat by themselves! I've based it a little on Swedish meatballs, and of course, the choice of spices here are purely optional. I just raided whatever I had in my spice rack at the time (tarragon and chilli powder) and you can opt to put in what you like.

White meatballs
500 gm minced chicken
250 gm minced pork
1 cup breadcrumbs
milk
Spices - 1 tbsp black pepper, 1 tsp chilli powder, 1 tbsp tarragon

1. First, the breadcrumb mix. Put 1 cup of breadcrumbs into a bowl and pour just enough milk to soak the mix. At this point, add in your spices. The breadcrumbs serve as a binding agent to keep the shape together.

2. The basic proportion for chicken to pork to breadcrumbs is 2:1:1. If you'd lke to use only one type of meat (like say, for Muslim readers who cannot eat pork) then the proportion of meat to breadcrumbs is 3:1.

3. Form into meatballs and cook in boiling water. When fully cooked, the meatballs should turn white and float to the surface of the water. Because milk is an ingredient in the binding mix, you should cook all the meatballs and not leave them for later. Store in fridge or freezer until required.

Tune in later in the week to see what I have in mind for the meatballs!

Tags:

AddThis Social Bookmark Button

Tuesday, January 03, 2006

budget briyani and butter chicken


i started this blog with an indian recipe, so it's quite apt that i start the first recipe post of the year with another indian recipe.

Budget briyani

1 cup rice (plain white or basmati preferred)
1 and 3/4 cup water
1 half onion, chopped
2 shallots, chopped
2 tomatoes, chopped
1 tsp tumeric
1 tsp coriander powder
1 cinnamon stick
1 star anise
4 cloves
Black pepper to taste
2 tbsp butter

1. In a rice pot or rice cooker, soak the rice in the water.
2. Heat butter in pan, fry onions and shallots until fragrant. Add tomatoes and rest of the spices.
3. Pour the mixture into the rice pot, mix well before cooking rice.


Butter chicken

Cooked chicken pieces (leftover chicken will be ideal, if not roast raw chicken in oven for 25 minutes)
3/4 stick of butter
1/2 cup tomato paste
Half an onion, sliced
1 tsp coriander powder
1 tsp tumeric
1 tsp crushed black pepper
2 chillis, sliced

1. With a little butter, fry onions until fragrant.
2. Add tomato paste and fry a little to cook it. Add rest of the butter and spices and mix well.
3. Add chilli slices into the mix. If you're worried about spicyness, don't worry! It's not spicy at all, even with the seeds in. But they add a richer flavour into the sauce.
4. Finally, add the cooked chicken. Coat evenly with sauce and cook another five minutes.

Tags:

AddThis Social Bookmark Button

Friday, December 30, 2005

leftover pockets


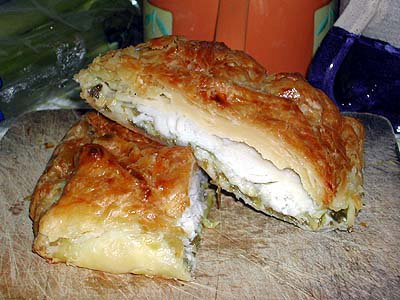
So after having graduated, i'm technically not a student anymore. But i'm still on a budget! Particularly since i haven't found a job yet which means i'm officially "unemployed".

No one's put up anything festive over the holidays, so i decided to do mine. It's kind of a budget recipe, since it's made with leftovers. Except for puff pastry. That's not the kind of thing you expect to have lying around in the fridge.

Leftover pockets

A handful of spinach, sliced
An equal amount of shredded cheese
1 tbsp olive oil
Pepper to taste

Leftover chicken/turkey/meat/uncooked white fish
Puff pastry sheet

1. Preheat oven to 200 degrees celsius, fan forced.

2. Mix the first four ingredients together in a bowl. Place mixture on the centre of a puff pastry sheet.

3. Lay meat over spinach mixture, wrap up in a neat package

4. Lay on greased baking sheet and tray and bake for 25 minutes

Tags:

AddThis Social Bookmark Button

Wednesday, November 16, 2005

Cheater's Chicken Rice


Last night, before I slept, I found myself craving for chicken rice. So i told myself i would make some for lunch today. It's a cheater's version of chicken rice, meaning that this is the super-budget version of chicken rice: not full-on enough for the heavy preparation (making the chicken soup stock). The second reason it's a cheater's recipe is bacause it uses roast chicken rice recipe, and not the steamed chicken. But the best part is that it'seasy to prepare and it tastes like the real deal.

Cheater's Chicken Rice
(serves 2)

For the rice:
300 ml white uncooked rice
Chicken fat - skim some off chicken thighs and render them under heat
A few slices of ginger
450 ml Water (or chicken stock, if you have time to make the real deal)
1 tsp salt

For the chicken:
Supermarket ready-roasted chicken, enough portions for two people
1 tbsp light soy
1 tbsp sesame oil

1. Prep the rice! Heat the chicken fat (you want the oil) and fry the ginger slices until fragrant. Add uncooked rice and coat everything with the oil. Yes, it sounds disgusting, but this is what makes the chicken rice so tasty. Another reason why you shouldn't eat so much chicken rice back home!

2. Pop everything - rice, oil, ginger - into rice cooker and add water and salt. Stir well before cooking. The rice to water ratio should be 1:1.5. Cook in rice cooker (or, if you're like me, in the microwave).

3. Cut up chicken in portions, paying special attention to parts with skin. Skin is good! Helps soak up the seasoning and give taste. Also adds the fat content to this recipe, so again, don't be eating chicken rice night and day. Good parts for portions: the breasts and drumsticks. Thighs are a bit oily. Make sure you lay them out skin side up.

4. Heat up oven - 160 fan forced. We're not going to cook the chicken again, just heat it up and baste it. Mix the soy sauce and sesame oil and brush half the mixture over the chicken. Place basted chicken in the oven for a couple of minutes, and then baste with the remaining mixture. Place in oven again and switch off. Let heat keep the chicken warm while the rice finishes cooking.

5. Dish out rice and serve with chicken on top! Drizzle with soy sauce and sesame oil if desired, serve with sliced cucumber if you have it. Share with depressed housemate.

Tags:

AddThis Social Bookmark Button

Thursday, October 13, 2005

no sweat! chicken feet! ha! ha! all the way!

you either love them or you loathe them... me, i'm definitely in the love category.

This one is like the one you find travelling around in dimsum carts. Although, what i'd really like is the recipe for the one they have with chicken rice. you know? the translucent cold boneless one. but on to the recipe...

What you need:
Chicken feet, half kilo

(Marinade)
1 tbsp black bean sauce
1 tbsp minced garlic
1 chilli, finely sliced
1 tsp sesame oil
1 tsp oyster sauce

1. First, get chicken feet from the butcher. Big poultry stores should have it, and for cheap too... like will cost less than $2 for a kilo. Alternatively, get eight chickens and chop off their feet. hahahaha... Don't forget to chop off their claws. They don't call it chicken scratchings for nuthin.

2. Boil the feet in water until skin is soft... about 15 to 20 min maybe? Don't throw the water away! You can use them to steam the feet later, but better still, save it because it's quite good chicken stock on its own.

3. In the meantime, mix the marinade ingredients together in a large boil. Place the boiled chicken feet in the bowl and marinade well for a few hours.

4. Finally, steam the chicken feet, marinade and all. Eat with rice or place it on a cart (shopping trolley also can) and push around the house.

No sweat! Chicken feet! Ha! Ha! All the way!

Tags:

AddThis Social Bookmark Button

Tuesday, September 27, 2005

May's happy dry indian curry


*Err..not yet. Let me tell you a little something about myself first*

You know the funniest thing? Nearly a year ago I couldn't cook. Didn't want to. A year down the line and I'm posting recipes. Hmm.

Moral of story? Anybody can cook.

I must admit that I can be quite weird when I cook. For one, I'm bloody picky about who I cook for (exceptions in potluck parties). I don't cook for bastards. And certainly not pricks. So if you're a bastard, or a prick...too bad. If you're nice to me, I'll cook for you.

My second quirky habit is that I like to talk to my food. Yes you heard right. Even when I cook for myself. But most of the time, I start having this full-on conversation (in my head) when I prepare a meal for an exclusive bunch of friends. Or for my partner. A normal in-may's-head conversation goes something like this:

Okays...be nice...today we're cooking for ****, so let's see. What do we have here? Hmm. Okay, okay...looking good...let's taste it...hmm....

I know it sounds wrong but hey. :D

I discovered something interesting yesterday; if I don't talk to my food, there's bound to be disaster. Yesterday I made bak kut teh. Didn't talk to it and sure enough, I forgot the dark sauce. Bak kut teh looked murky brown. Oopsie.

Anyways....

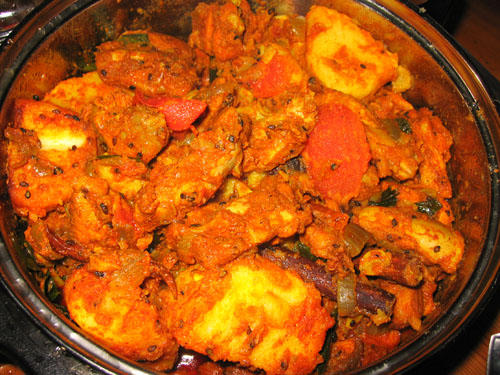
May's happy dry indian curry! (finally.)

I love Indian food. I also like showing it off when I know it looks, tastes and smells authentic. Picture above was taken by dear prettyhazy during a party.

Now now...vat you need:

Chicken (duh...use chikadoo drumstick!)
Potatoes (chopped roughly)
Tomatoes (sliced thinly)
Red onion(nice red ones that can make you cry when sliced)
Garlic (crushed and chopped into bits)
Ginger (just a tiny bit)
Dry chilli
Fresh curry leaves (from Safeway. Bloody expensive but worth it!)
1 teaspoon of black mustard seed (this you can get at any good asian grocer)
Aniseed star (just one would do; too much of it and your dish would taste like colgate)
Cinnamon stick (just one!)
Kunyit (yellow powder thingy; don't really know how to describe it)
Chilli powder
Baba's meat curry powder

*Unless specifically mentioned, I haven't put any measurement/quantity on most ingredients. I’m a happy believer and follower of estimation. Just talk to your food.*

Okay! Let us start!

The night before:

Marinate chicken/s. Cut drumstick into smaller pieces so that it's easier.

1. Add in a dash of kunyit
2. Lots of chilli powder
3. And lots of meat curry powder.
4. Then add salt. Add a tiny bit of water and marinate the whole thing.
5. Place chikadoo in fridge overnight.

Then on the day itself:

1. Put oil in pan and fry potatoes. Once cooked, place aside.
2. Put a little more oil in pan. Wait till heated then throw in black mustard seed. Fry.
3. Throw in cinnamon and aniseed star.
4. Add garlic, onion, curry leaves, dry chilli and ginger. Fry until fragrant.
5. Once satisfied with smell (it would smell divine at this stage), add in chicken pieces.
6. Once cooked, add in tomatoes.
7. You'd be able to see a tiny layer of oil rising on the top. This means you're nearly done!
8. Turn fire down to low and add the potatoes.
9. Stir, stir, stir, stir, stir. Talk to your curry. Befriend it.

Done!

Tags:

AddThis Social Bookmark Button