Google

Saturday, October 21, 2006

Festival of lights...Diwali

Happy Diwali to Indians worldwide~ and Malaysian's like me finding every excuse to have a festive celebration!

Diwali, also called Deepavali (Hindi: Diwali or Deepavali, Marathi: Tamil: Kannada: Deepavali) is a major Hindu festival. Known as the "Festival of Lights," it symbolises the victory of good over evil, and lamps are lit as a sign of celebration and hope for mankind. The festival of Diwali or Deepawali (literal meaning: lines of lamps) is rooted in the mythological epic Ramayana, and is a celebration of the return of Lord Ram after killing Ravan the Demon during his exile for 14 years. The day of killing Ravan is celebrated as Dussehra (19 to 21 days before Diwali). Celebrations focus on lights and lamps, particularly traditional diyas. Fireworks are associated with the festival in many regions of India.

Diwali is celebrated for five consecutive days in the Hindu month of Ashwayuja. It usually occurs in October/November, and is one of the most popular and eagerly awaited festivals of India. Hindus, Jains and Sikhs alike regard it as a celebration of life and use the occasion to strengthen family and social relationships. (wikipedia)
When the Malays celebrated "Hari Raya"; my chinese family would have a celebration of our kind; charcoal on the barbecue pit, Mah-Jong sets, wine, cards, Karaoke, and the sort! *laughs* I love being Malaysian...and I love my family's take on life and festivity.
Still in tune with my habits from home; I had a little Diwali celebration in my Sydney kitchen.
Milk and Coconut Burfi
1 cup fine grated fresh coconut
1 L milk
3/4 cup sugar
3 tbsp condensed milk
3-4 tbsp ghee (I omitted)
5 cardamom pods
Chopped almonds as garnish
Heat milk and cardamom in a large pot, take it off the stove and cover with lid for 30 minutes. SPoon out the pods. Return pot to stove and add the rest of the ingredients (leave out the almonds). Stir mixture over low heat for about 1-2 hours till mixture turns thick and sticky. Be careful to watch for the milk burning. Try using a pot with a thick base and stirring continuously. When lumpy and sticky, add in the ghee and cook for another 30 minutes. Dish out onto a greased mold/tray or layer with clingfilm (like I have done with mine). Top with almonds and allow to set overnight. Slice to serve.This recipe reminds me of a creamier and softer version of coconut candy I used make in Malaysia.
burfi is an Indian /Pakistani sweet made from condensed milk, cooked until it solidifies. Barfi is often flavoured with cashew, mango, pistachio and spices, and is sometimes served coated with a thin layer of actual silver. Visually, barfi sometimes resembles cheese, and may have a hint of cheese to it. For this reason, barfi is sometimes called "Indian cheese cake". Barfi is popular all over India and is often a part of Indian festivals (wikipedia)
Indian sweets are commonly eaten in small portions as they are meant to be very sweet and intensely rich. These gave me an immediate sugar rush with one mouthful! Haha; I still remember my first taste of Gulab Jamun...it was probably the sweetest thing I've eaten to date! *laughs*
Im visiting an Indian home for dinner to celebrate! *gets excited* Thanks heaps to Pinky's family for inviting Amrit and I over!

Tags:

AddThis Social Bookmark Button

Thursday, October 19, 2006

gyutan don


awhile ago , i was a regular patron of a cozy japanese place until i became loyal to this particular item on the menu . the only catch was that , for the longest time , i never bothered to figure out what it was exactly .

it's understood that many will be uncomfortable even with the thought of using the main ingredient .

why ?

gyutan is japanese for ox tongue .

i can already sense the squirms...but hey , at a mere flat market rate of 3 bucks per giganormous piece , it's will save you loads of money when it comes to meals , expecially with such a simple recipe . at this price , you'd be wondering how much those korean barbeque places earn . peculiarly , i've encountered gyutan don only in the japanese place i mentioned .

just a few notes before you attempt this ( if you actually want to ) . when working with ox tongue , understand that you need to wash it very thoroughly with cold water and then wash it even more thoroughly again and again . get the point ? haha...why the cold water ? it's extremely difficult to manouver around and slice when it's not stiff and almost impossible without a sharp knife . also , make sure you skin it and only use the meat . one final thing , don't chop it into chunks like me...really...only use very thin slices .

there are absolutely no recipes for this online , so i had to come up with one myself...a not so japanese but simple one .

what you need ar?

1/2 ox tongue , sliced very thin
1/3 cup mirin
1/3 cup dark soy sauce
1 tablespoon oil
spring onion , chopped
small red chillis (a.k.a. cili padi) , chopped

how liao ?

see how short the ingredient list is ? simply marinade the well-washed tongue slices in mirin and dark soy sauce for an hour or two . grill on an oiled pan until cooked ( which would take only a couple of minutes if you use slices hor ) . towards the end , season with a touch of mirin and off the fire . just before serving , briskly toss it in the spring onion and chillis to give them that extra oomph . it's that simple lor .


Tags:

AddThis Social Bookmark Button

Tuesday, October 17, 2006

Kaya

I spent 3 1/2 hours reading my management notes, preparing dinner and dancing away to music as I stood stirring this precious pot all afternoon.
What's so precious? you ask...
It's Kaya. The word "Kaya" means "rich" in the Malay language, and RICH is definitely a good word to represent its yummy sweet gooey-ness ! In culinary terms, Kaya would be described as a Malay spread of Egg curd/jam.
In Malaysian-student-studying-abroad terms, Kaya= MmmMmmmmm!*YUM!!*

I'm usually all for fast and easy recipes; the type of person who would try cooking/defrosting/baking almost everything in the microwave to see if it works quicker that way! *laughs* I'm still bewildered by how I refused to work that same way this morning. I browsed and took apart 8 or more Kaya recipes online and from books. I tweaked my proportions a little according to reviews and Kaya-making tips available to reduce the sugar and cholesterol levels without destroying the recipes completely.

1 1/2 cup sugar
1 1/3 coconut milk - try to get freshly squeezed milk (canned worked fine for me too *shrug*)
5 eggs (XL size)- use very FRESH eggs

Beat eggs and sugar till well blended. Cook in a slow cooker over low heat. When slightly thickened, pour in coconut milk in a thin stream. Stir well until liquid mixture is thick and gooey. The color should have changed from yellow to a darker shade in 1-2 hours of constant stirring. Look for a recipe you can do in the microwave if you're feeling lazy. Google is gold. *wink*

*sigh* My end product was SOoo VERY satisfying....stirring Kaya in my slowcooker continuously for hours was frustrating but there wasn't any other way to achieve deliciously smooth, silky Kaya!I decided to share my Kaya with several Malaysian friends who lived nearby to try making it worth my trouble. I would eat my Kaya on a slice of toast for breakfast in the morning; but I wouldn't touch Kaya out of jars available at Asian supermarkets...
After having a go at making my own; and shivering at the cup loads of sugar....I wonder what goes into manufactured Kaya which tastes a WHOLE lot sweeter and is BROWN....mine is yellow...cup and cups of sugar caramelizing was done to achieve its dark rich color. *shudder*
I made several strips of butter-y puff pastry as a delicious accompaniment to our freshly made Kaya. Dessert was simply divine!...*sigh* heavenly....*licks lips*

Tags:

AddThis Social Bookmark Button

Thursday, October 12, 2006

chilli con carne !


i shamelessly admit that this is similar to noel's chilli , with a few exceptions of course...i maintain mine is a mexican version (haha) and it's capable of standing as a dish alone...but still simple. furthermore, with the heat wave now, i was too lazy to obtain the fresh tomatoes.

what you need ar?

500 g minced beef (doesn't matter whether it's premium or lean)
1 whole white onion, chopped ( i tend to shape them as rings, but diced also can lar)
4 cloves garlic, crushed
1 whole red chilli (note that they're actually called capsicums here) , cored , seeded and diced
5 small red chillis (erm...a.k.a cili padi...the thin ones...not capsicums) , chopped...of course , to be truly mexican , you'd add jalapenos here...but i can't seem to find any .
1 standard 400 g chopped/diced tomatoes
1 standard 400g red kidney beans, drained
1 cup beef stock/water mixture
5 teaspoons ground cumin seed
3 teaspoons chilli powder
1 teaspoon ground coriander

how liao?

in your pot , sautee the onion and garlic on a low fire until soft . then , chuck in the minced beef and cook the mince until it loses its reddish pink colour....make sure to break the meat up hor ( a fork will execute this just fine ) . add in the can of tomatoes (with the juice hor) , the diced capsicum and the chopped small chilllies . stir and simmer for 10-15 minutes ( let the meat absorb the main flavour hor ) . next , add in the beef stock/water mix and season with the ground cumin, chilli power and ground coriander . cover the pot and simmer over gentle heat for 45-60 minutes ( depending on your desired consistency lor ) . finally , add the drained red kidney beans and cook for another 10-15 minutes . tenga...fruir la aji .

warning : please never underestimate the spiciness of this recipe under any circumstances .

notes: you may wish to season with some fresh ground black pepper as well but i don't think it makes much of a difference and for those of you who are willing to be adventurous , add a couple of blocks of dark chocolate too (make sure it's >70% cocoa hor)...and you'll have dark chocolate chilli con carne .

extra note : i realise that the amount cannot be finished within a single siting ( unless you share) but that was done on purpose...because chilli tastes better a day old...or more :)

Tags:

AddThis Social Bookmark Button

Monday, October 09, 2006

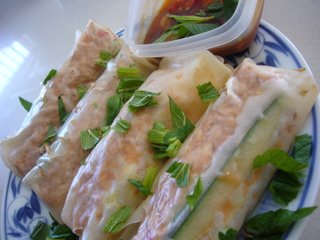
Spicy Tuna Rice Paper rolls

I was in a hurry to dash out for a couple of errands this afternoon and didn't have much time to map out lunch for us at home. I opted for a 'no-cook' meal of quick healthy rice paper roll ups for my 'babies' before running off. I call them my babies because I love them to PIECES and I'm the self-proclaimed 'mommy' of the house.*laughs* Rice paper rolls are so quick to make; and they didn't take me much effort at all....*sigh* an ingenious culinary discovery by the Vietnamese!
I dug around the pantry and refrigerator for loose bits of vegetables and came up with a delicious "tuna-combo" which had our taste buds tingling with satisfaction.

Makes 8:
8-9 Rice paper sheets
2 cans of spicy tuna
1/4 iceberg lettuce leaves shredded
1/2 cucumber sliced into thin strips
1 carrot grated
1 red chilly sliced
2 stalks fresh mint leaves (roughly diced)
fried crispy shallots ( available at asian supermarkets)
Sauce: 1 tbsp sweet chili sauce+2 tbsp light soy sauce+ 1 tsp fish sauce + 1/2 red chilly sliced+ 1 inch cube ginger sliced thinly+ 1 garlic clove crushed and roughly chopped+ 1 tsp sugar

Stir sauce ingredients in a small container till well incorporated and set aside.
Soak 1 sheet of paper in a shallow bowl filled with water for approximately 30 seconds. Gently remove and lay on a flat work space. Arrange filling ingredients in the center horizontally, sprinkle mint leaves+ fried shallots and fold the left and right corners in by 1-2 inches. Gently roll up the rice paper roll into a long cyclindrical shape. Repeat with the rest of the rolls. Serve with spicy chilly+ ginger sauce!
The rolls may turn out a little messy in the beginning but keep in mind that practice makes perfect. Try not to soak the paper for too long or it may tear too easily. Throw out the torn ones...start over with a new sheet...unless you want to end up with rice paper rolls leaking like a worn-out faucet.

Tags:

AddThis Social Bookmark Button

Sunday, October 08, 2006

Party Food: Easy (iest) Carbonara

Before I start, let me first apologise for the crappy photos that you will encounter.

The digital camera moved out the day my sister did. So there. I'm left with my 1.3 megapixel phone camera.

...

I believe my calling in life was to create the easiest, fastest and never-will-fail recipes.

I'm no gourmet chef and I have since given up on trying to be a Domestic Goddess but I still need to eat, right?

Over the weekend I got invited to a friend's party and groaned inwardly when he told me to bring a dish.

I knew everyone would be bringing a salad or dessert so I thought I'll be nice and do a mains.

This is the easiest and best of all, guranteed to never fail recipe of a carbonara (a cream-based pasta sauce).

If you do fail, then there's something obviously wrong with you... :)

*note that this recipe is measured to feed a troop of starving males. So measure accordingly.

* I detest gardening so all my herbs came from bottles.

What you need:

750g Spiral Pasta

300ml Lite Cream (4 bottles)
300g (or less) Bacon Pieces
Plenty of Mushrooms
2 cloves of Garlic
Chilli Flakes

Parsley
Mixed Herbs
Salt
Ground Pepper

Putting it together:

1. Boil the pasta.

2. While the pasta is boiling, chop up the garlic, mushrooms and bacon (unless you're me and got bacon pieces from the deli).


3. Fry up the mushrooms. When the mushrooms are nearly done (turning a darker colour and softening), throw in as much (or little) chilli
flakes as you want and add some mixed herbs. Set aside the mushrooms.

4. Fry up the bacon quickly. Set aside on some paper towels.


5. Clean up your frying pan or wok. The pasta should be done by now so drain the water and place it in a container and allow to cool.


6. Pour in the first 600ml of Lite cream. Allow the cream to heat up for awhile on a moderate fire then add in the equivalent to 1 clove of garlic.


7. Add in half the bacon and half of the mushrooms. Stir for awhile then leave to simmer. Add in ground pepper, salt to taste, parsley and any other spices if you think you need a bit more omph.

8. Leave to simmer until it starts bubbling happily.

9. Once the sauce is happy, remove from heat and pour it into a container.


10. Repeat process with the remaining cream, mushrooms and bacon.

DONE!

* Remember to keep the sauce and pasta separate
*Always, always allow the sauce to simmer then bubble up
* 300 ml of cream is enough sauce for 2 people.

Verdict: It was enough to fill up the hungry males and one male in particular had at least 4 helpings.

Tags:

AddThis Social Bookmark Button

Friday, October 06, 2006

Mid Autumn Festival (Homemade Mooncakes)

The Mid-Autumn or Mooncake Festival falls on the 15th day of the Chinese eighth month; which happens to be....TODAY! *gets excited* I'm not the type to keep track of Chinese lunar calendar dates...but as the festival creeps up on us, I am constantly reminded by Asian vendors who begin piling up yummy mooncakes for sale.

In Malaysia, the Chinese celebrate the festival with family gatherings, prayers, mooncakes and lantern parades by children. Weeks before the festival, Chinese families present gifts of mooncakes to friends and senior relatives to foster better ties with them.
On the 15th night when the moon is shining its brightest, offerings of mooncakes, deep fried chicken, roasted pork, water calthrops, yam, water melon seeds and Chinese tea are made to deities and ancestors, on the praying altar. Lighted lanterns are also hung conspicuously in front of homes. Prayers are offered with the customary lighting of joss-sticks, red candles and golden joss-paper are burnt. After prayers, there is feasting and merry-making with children carrying lighted lanterns around the neighborhood. Here they are sometimes joined by their non-Chinese friends in celebrating with lanterns. SOURCE
How did mooncakes come about?

Back during the Soong dynasty when the Chinese were oppressed by the Mongols, their rebel leaders sought to overthrow the Mongol overlords. As meetings were banned it was impossible to make plans. Liu Fu Tong of the Anhui Province came up with a plan by requesting permission to distribute cakes to his friends to bless the longevity of the Mongol emperor. He made thousands of cakes shaped like the moon and stuffed with sweet fillings. Inside each cake however was placed a piece of paper with the message: ?Rise against the Tartars on the 15th day of the 8th Moon?. Reading the message, the people rose against the Mongols on a local scale. This rebellion enabled Chu Hung Wu, another rebel leader to eventually overthrow the Mongols. In 1368, he established the Ming dynasty and ruled under the name of Emperor Tai Tsu. Henceforth, the Mid Autmn Festival was celebrated with mooncakes on a national level.
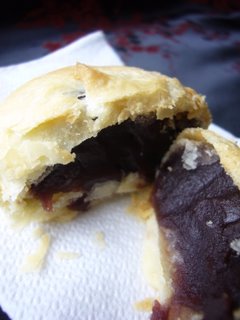
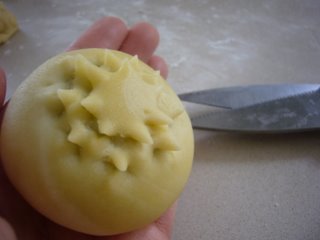
Mooncakes are traditionally shaped with a wooden mold filled with intricate carvings to create extravagant Chinese designs. I didn't have fancy mooncake equipment to toy around with and decided my fingers will have to do. I used a combination of oil and water-based dough to create flakey layers of golden pastry.In China, the Mid Autumn festival is celebrated to signify the end of the annual harvest season. For our tiny community of Malaysian students, mooncake festival is just another reason to gather, eat mooncakes, host parties and an excuse to make paper "latterns".

Use ready made lotus paste/red bean paste (available in tins/plastic containers at Asian grocery stores)
Yellow dough : 1/2 cup flour + 3 tbsp melted butter

White: 1 cup flour + 3 tbsp butter+ 5 tbsp water+ pinch of salt

Mix dough ingredients in 2 separate bowls and form 10 portions of tiny balls with each.
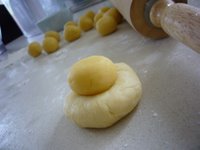
Flatten white dough lightly with your palm. Wrap yellow dough ball in white disc. FLatten with a rolling pin into a thin disc. Roll up the disc from bottom edge to form a cigar. Flip it 90 degrees and flatten again. Roll the long cylinder from the bottom up again to form a compact spiral on the sides. Stand the cyclinder up and flatten into a circular disc (4 inches in diameter). Spoon bean mixture into the center and pinch corners of dough to seal. Bake in preheated 350 degree oven for 20-25 minutes in the middle rack.There are countless designs you could come up with. I didn't put much effort into these but possible variations are endless! Dig up your collection of cookie cutters..blades, pattern presses, etc. and you're in business! I made several bunny rabbits just for fun *shrug* I'm a child! *grin*

Tags:

AddThis Social Bookmark Button

Satay Beef Skewer

Easiest dish ever.

Ingredients:
+ 250 g of diced beef/chicken/pork/lamb
+ 4 bamboo skewers
+ satay sauce
+ honey (optional)

Steps:
1. marinate meat with 1 tbsp satay sauce
2. stick the meat on the skewer
3. baked it for 15-20 minutes at 210 degree
4. add honey to finish (optional)
5. serve with satay sauce (optional)

Ta-da!

Satay Beef Skewers*

Tags:

AddThis Social Bookmark Button

Wednesday, October 04, 2006

Abalone Tofu & Minced Chicken Dish

It has been awhile since my last post. Took a short trip to Grampians during the spring break.
My fave pic from the trip! You guys should go visit the place if you have the chance to =)

Photobucket - Video and Image Hosting


Anyways, back to the food! There are actually two methods of cooking this dish and it's up to you to choose how you want to do it.

Photobucket - Video and Image Hosting


To serve 3-4, you need:
a. 350g-400g minced chicken
b. 2 tubes of egg tofu-sliced
c. Abalone Sauce (i use New Moon's but am sure any other brand is also acceptable)

Marinate the minced chicken with:
a. 1 tbsp sesame oil
b. 1/2 tbsp light soy sauce
c. a dash of pepper

Steaming Method:
Remember to prepare the steamer before hand. Then in a bowl, place the marinated minced chicken first followed by the sliced egg tofu on top of it. Pour abalone sauce generously over the ingredients and proceed to steam it for 20-25 minutes.

Note: Use a bowl because there will be some gravy when it's done. =)

Stir-fry Method:
Heat the wok and fry the marinated minced chicken till it is half-cooked. Add the sliced egg tofu and pour abalone sauce generously over ingredients. Then add 2-3 tbsp of water (depending on how much gravy you want) and let everything simmer for about 15 minutes.

Variation: Add some shiitake mushrooms if you like! Also, try replacing Abalone Sauce with Oyster Sauce for a different flavour.

All you need is a bowl of steaming hot rice and your lunch/dinner is settled! Enjoy. =)


Tags:

AddThis Social Bookmark Button

Thai Seafood Salad


I was in a bit of a Thai mood last week - probably because the week before that us officefolk were at Thai Express to celebrate one of my colleagues' birthday. This recipe is "inspired" from TE's seafood salad, but a side-by-side comparison will quickly show that they are completely different.

Thai Seafood Salad

The Salad
Bee hoon a.k.a. Rice vermicelli noodles, soaked in hot water
Coriander leaves
Mint leaves
Shrimp, cooked
Squid, scored and cooked
(all the ingredients above portioned out to the number of serves you want to make. It's your preference.)
1 and 1/2 tsp fish sauce
1 and 1/2 tsp light soy sauce
1 and 1/2 tsp sesame oil
(sauces per serve)

The Dressing (for 1 serving)
2 tbsp Thai Sweet chilli sauce
1 tbsp peanut butter (chunky preferred)
1 tbsp sesame oil
Juice of half a lime
Black pepper to taste

1. Set aside seafood and mix the rest of ingredients for salad together.
2. Combine dressing ingredients with a whisk. Reserve have the dressing and toss the rest of the mixture with the salad.
3. Toss the cooked seafood with the reserved dressing. Top salad. Serve cold or at room temperature.

Tags:

AddThis Social Bookmark Button